The serpentine belt in a 2002 Honda CR-V drives essential accessories like the alternator, power steering pump, and air conditioning compressor. Failure can cause stalling, battery drain, or steering issues. This guide covers common problems, diagnostics, and proper belt replacement using the correct routing diagram.
Common Serpentine Belt Issues
A worn or damaged serpentine belt in the 2002 CR-V often exhibits:
- Squealing or chirping noises due to slippage from a loose or glazed belt.
- Visible cracks, fraying, or glazing, indicating aging or contamination.
- Complete breakage, leading to loss of power to critical systems.
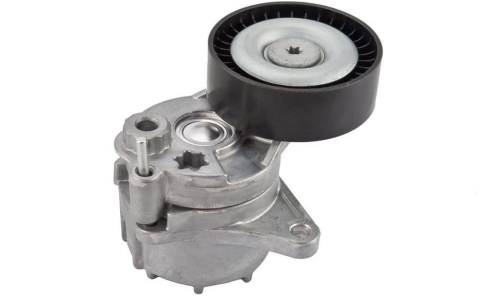
- Tensioner pulley misalignment or wear, exacerbating belt failure.
Primary causes include belt degradation over 5-7 years or 60,000-100,000 miles, oil leaks from valve cover gaskets, or tensioner component failure. Address promptly to prevent engine overheating or accessory damage.
Diagnosing Serpentine Belt Problems
Conduct a visual and auditory inspection:
- Examine the belt for cracks, missing ribs, or excessive wear; replace if damaged.
- Listen for high-pitched squeals during cold starts or acceleration, indicating misalignment.
- Check belt tension by pressing midway; deflection should be under 1/2 inch. Excess slack points to a faulty tensioner.
- Test accessories for malfunction—e.g., dimming lights suggest alternator drive failure.
Use a belt dressing temporarily for noise, but replacement is the definitive solution for safety.
Replacing the Belt with Correct Routing Diagram
Ensure the new belt follows the precise routing to avoid premature wear. For the 2002 CR-V 2.0L or 2.4L engine, the diagram sequence is critical. Replace in steps:
Required tools: Ratchet set, serpentine belt routing diagram memorization (detailed below), tensioner tool.
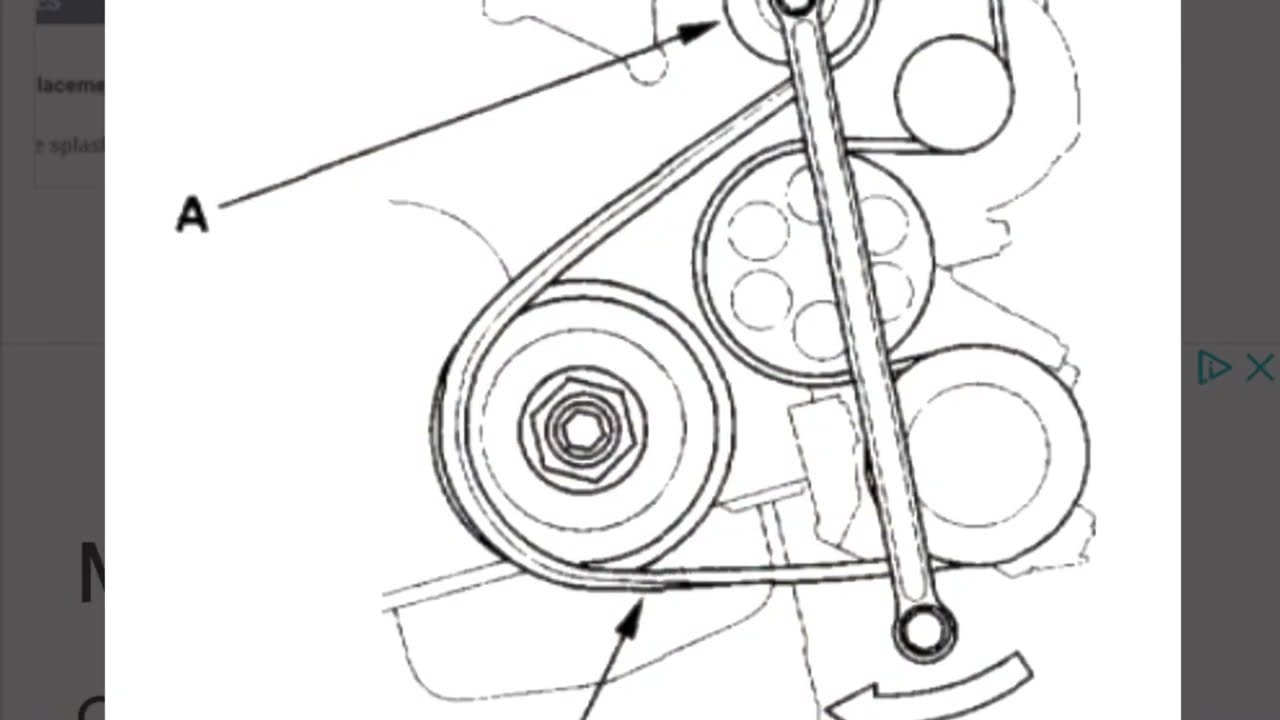
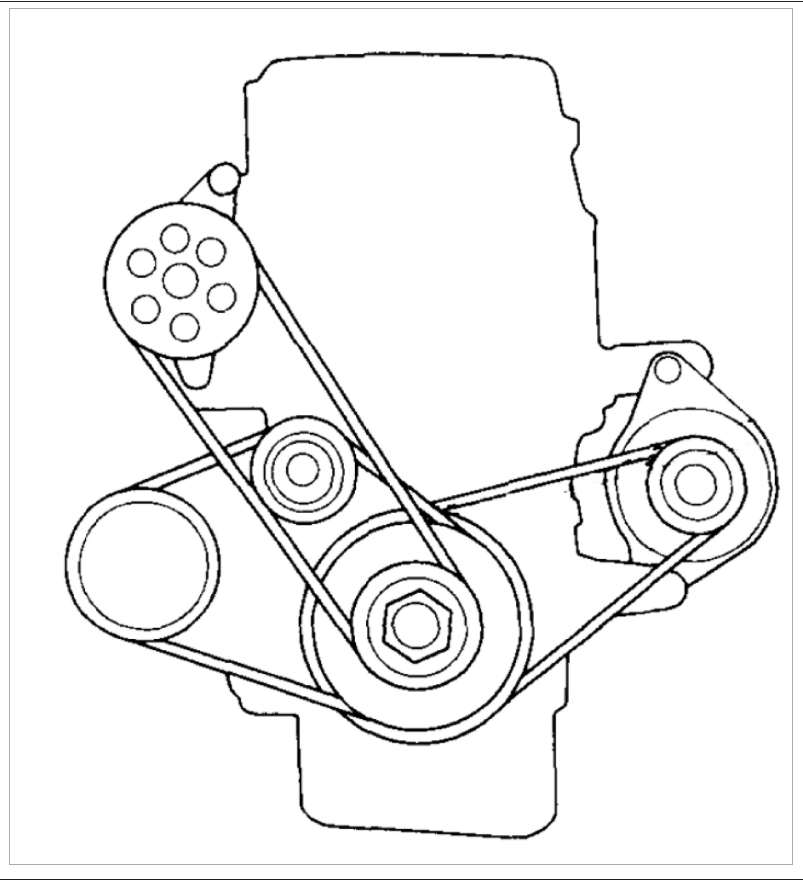
Serpentine belt routing diagram for 2002 Honda CR-V:
- Rotate tensioner pulley clockwise to release tension.
- Route belt as: Crankshaft pulley → Idler pulley → A/C compressor pulley → Power steering pump pulley → Alternator pulley → Tensioner pulley.
Installation steps:
- Release tensioner using a wrench on the pulley bolt, sliding the old belt off.
- Clean pulleys of debris and oil to prevent slippage.
- Align the new belt precisely to the diagram path, ensuring no twists.
- Apply tension and verify smooth operation without noise; test accessories.
Use a quality OEM or aftermarket belt; confirm routing before start-up to prevent damage.