To replace fuses in a 1999 Lincoln Town Car safely using the diagram, follow these precise steps:
Required Tools & Materials
- Owner's Manual (for fuse diagram reference)
- Correct replacement fuses (exact amperage rating)
- Fuse puller tool (often included in fuse box lid)
- Test light or multimeter (optional for verification)
- Flashlight
Safety Precautions
- Disconnect the Battery: Always disconnect the negative (-) battery terminal before fuse replacement.
- Use Correct Amperage: Never install a fuse with a higher amperage rating than specified.
- Identify Cause: Replacing a blown fuse addresses a symptom; investigate the underlying electrical issue to prevent recurrence.
Locating Fuse Boxes
- Interior Fuse Panel: Primarily located below the dashboard on the driver's side. Release the panel cover by pressing the latches.
- Under-Hood Fuse Box (Power Distribution Box): Found in the engine compartment. Release the cover by pressing tabs. Contains higher amperage fuses and relays.
Using the Fuse Diagram
- Reference Printed Diagram: Fuse box lids display fuse/relay locations and amperage ratings. Cross-reference this with your Owner's Manual diagram.
- Identify Target Fuse: Locate the specific fuse number and its assigned electrical circuit (e.g., "Fuse 10 - 15A - Power Windows"). Ensure it matches the suspected malfunctioning component.
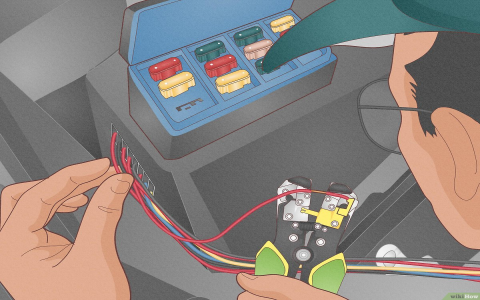
Removing the Blown Fuse
- Insert Fuse Puller: Use the fuse puller tool to grip the target fuse firmly.
- Extract Fuse: Pull straight out with steady pressure. Avoid twisting or prying.
- Inspect Fuse: Visually confirm the fuse is blown (broken metal strip inside the plastic housing).
Installing the New Fuse
- Match Amperage: Select a new fuse exactly matching the amperage rating (e.g., 5A, 10A, 15A, 20A, 30A).
- Align Correctly: Position the fuse squarely over the empty slot, ensuring the metal blades align with the contacts.
- Press Firmly: Push the fuse straight down until it seats fully.
Verification & Completion
- Reconnect Battery: Reattach the negative battery terminal.
- Test Circuit: Operate the component controlled by the replaced fuse to confirm function (e.g., turn on radio, power windows).
- Replace Covers: Securely snap the interior and under-hood fuse box covers back into place.
Important Tips
- Spare Fuses: Utilize unused spare fuse locations often present in the fuse boxes.
- Documentation: Keep the diagram accessible within the vehicle.
- Repeated Failure: If a new fuse blows immediately or rapidly, a significant electrical fault exists. Consult a qualified technician.
- Do Not Substitute: Never use foil, metal objects, or incorrectly rated fuses as substitutes.