For urgent access to the correct 2008 Honda Odyssey serpentine belt routing diagram:
Fastest Methods to Obtain the Diagram
- Repair Manuals: Consult Honda factory service manuals (available digitally or physically) or reputable third-party manuals like Haynes/Chilton. Look under "Engine Mechanical" or "Drive Belt" sections.
- Parts Counter: Visit Honda dealership parts departments or major auto parts stores (AutoZone, Advance Auto Parts, O'Reilly). Staff can often print diagrams from their internal systems upon request (provide VIN if possible).
- Online Databases: Access paid professional repair information services used by mechanics. Avoid unreliable free image searches.
Critical Information for Accuracy
Engine Type: The 2008 Odyssey exclusively uses the 3.5L V6 (J35A8 or J35A9 engine code). Accessory Configuration: Verify if your vehicle has Electric Power Steering (EPS) or Hydraulic Power Steering (HPS), as the belt routing differs slightly due to the hydraulic pump presence on HPS models.
Diagram Key: Ensure the diagram specifies "viewed from front" perspective relative to the engine bay (driver's side/passenger's side labeling).
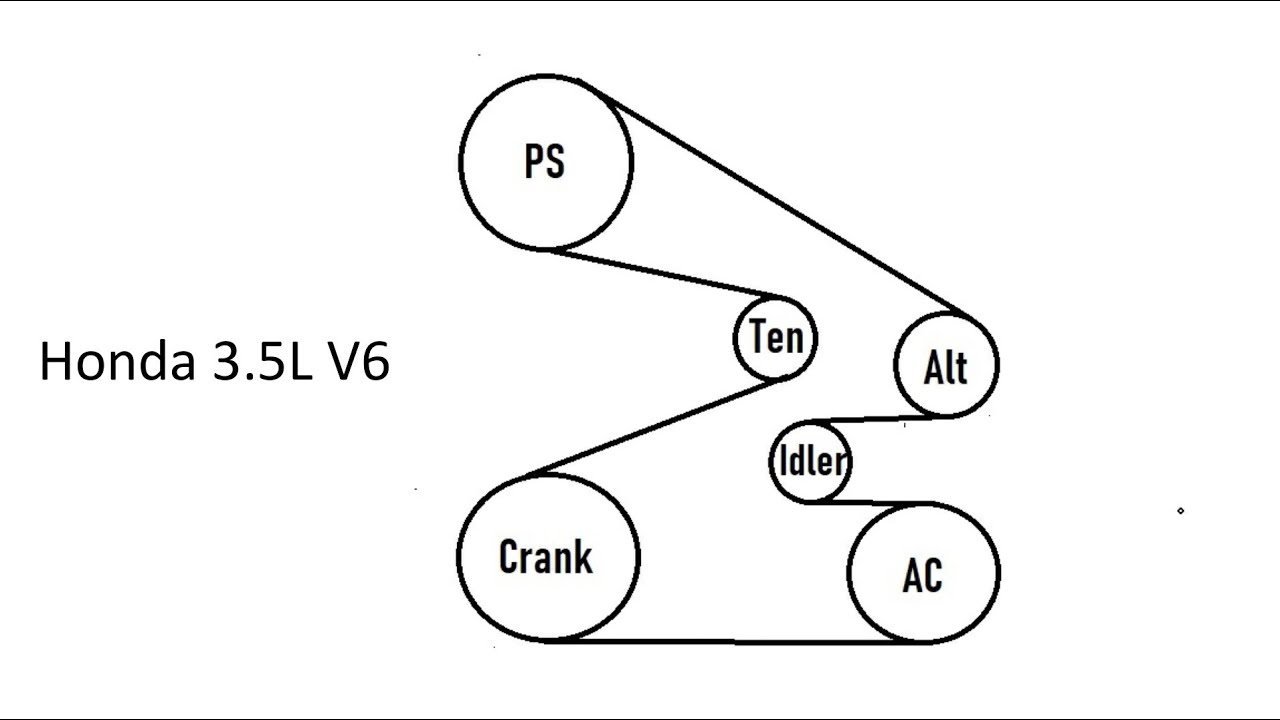
Belt Routing Overview (General J35 V6 - Confirm with Diagram)
- The crankshaft pulley is the primary drive point.
- The belt drives the alternator, power steering pump (if HPS), air conditioning compressor, and coolant pump.
- A spring-loaded automatic tensioner maintains proper belt tension; no manual adjustment is needed.
- The specific path loops over, under, and around these pulleys in a specific sequence determined by the engine configuration.
Always replace with the exact recommended belt size (length) for your specific engine and accessory configuration.
Precautions Before Replacement
- Disconnect the negative battery cable for safety.
- Note the existing belt's precise routing (take pictures/video from multiple angles) BEFORE removal - this is your final backup.
- Inspect all pulleys for smooth rotation (bearings), damage, or excessive wobble. Inspect the tensioner function.
- Identify the tensioner release mechanism (usually a square drive or hex bolt head). Ensure you have the correct tool ready.
Using the correct verified diagram is essential to prevent belt failure or accessory damage.