Replacing the serpentine belt on a 2003 Honda Pilot requires precision routing. Follow these steps using the engine bay's belt diagram sticker (typically on the radiator support or strut tower):
Tools Required
- 14mm wrench or socket
- New serpentine belt (6PK1870 size)
- Breaker bar (for tensioner)
Installation Steps
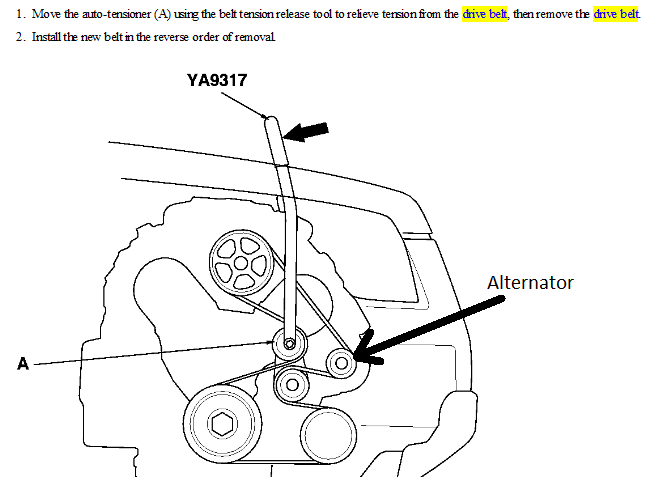
1. Access Belt System
Rotate the tensioner pulley clockwise using a 14mm wrench/breaker bar on the tensioner center bolt to release belt tension.
2. Remove Old Belt
Slide the belt off pulleys while maintaining tensioner pressure. Note the worn belt's routing path against your diagram sticker.
3. Route New Belt
Follow the embossed diagram precisely:
- Start at crankshaft pulley
- Loop counterclockwise around idler pulley
- Pass over water pump pulley
- Thread under alternator pulley
- Cross over power steering pump
- Finish at AC compressor pulley
4. Apply Tension
Rotate tensioner clockwise again and seat the belt on the final pulley. Slowly release tensioner until belt snaps into place.
Verification Check
- All ribs fully seated in pulley grooves
- Tensioner indicator mark within normal range
- No twists or misaligned sections compared to diagram
Start the engine and verify smooth operation without squealing. If abnormal noises occur, recheck routing alignment immediately.