Locating the correct serpentine belt routing diagram for your 2002 Buick LeSabre is essential for proper installation. Follow these efficient steps:
Check Under the Hood
The fastest method is often looking directly in the engine bay.
- Inspect the Radiator Support: Open the hood. Examine the large plastic panel (radiator support/core support) directly in front of the engine.
- Look for a Decal/Sticker: GM commonly placed the serpentine belt routing diagram on a decal affixed to this support. It may also be on the underside of the hood itself.
- Note Component Locations: The diagram visually shows the belt's path around pulleys (crankshaft, alternator, power steering pump, air conditioning compressor, tensioner, water pump/idler).
Utilize Belt Diagrams
If the under-hood diagram is missing or illegible, use common methods:
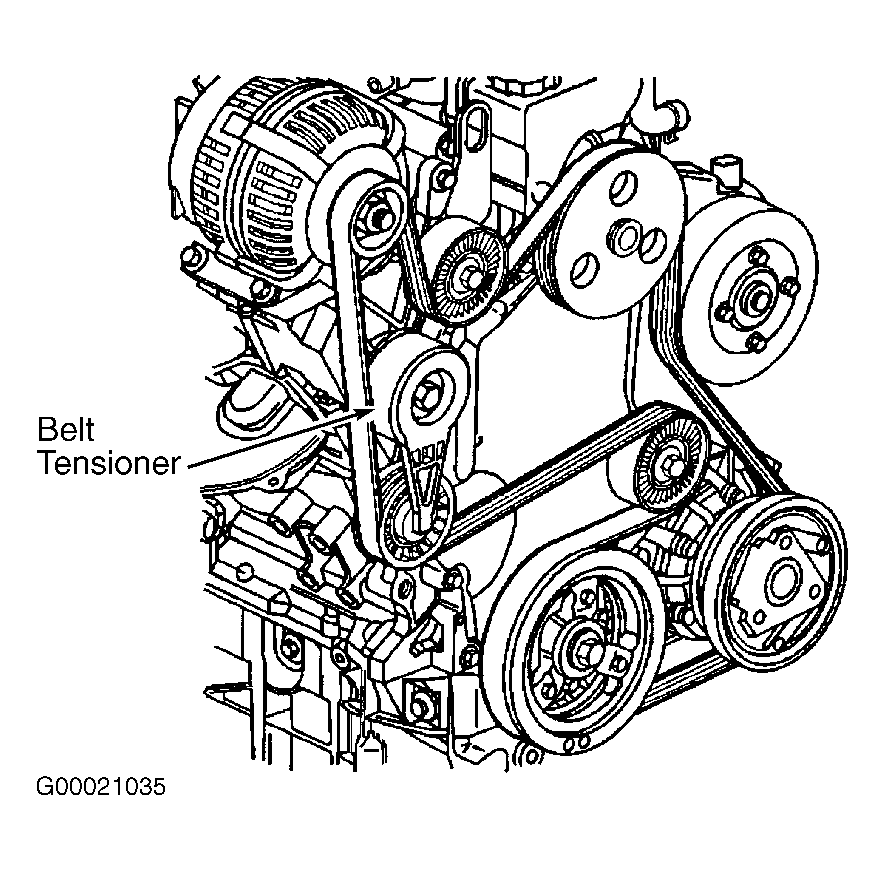
- Component Identification: Modern belts have ribs on one side (contacting the grooved pulleys) and are smooth on the back (contacting flat idler/tensioner pulleys). Identify the Automatic Belt Tensioner – a spring-loaded arm with a pulley.
- Find the Longest Run: The belt typically runs from the Crankshaft Pulley (the largest bottom pulley) to the Air Conditioning Compressor (usually high on one side).
- Trace Key Paths: Common paths: Crankshaft → A/C Compressor → Idler → Power Steering Pump → Tensioner → Water Pump → Alternator → Crankshaft. Verify carefully.
Important Considerations
- Engine Specificity: Ensure the diagram or path matches the LeSabre's 3.8L V6 engine (3800 Series II).
- Tensioner Operation: Always release tension using the tensioner pulley's square hole (use a 1/2" drive ratchet/breaker bar) for removal and installation.
- Diagram Verification: Double-check the routing against the actual pulley layout before fully tensioning the belt.
Caution: Always ensure the engine is cool and the ignition is off before starting work. Route the belt correctly to prevent accessory damage or belt failure.