
Important Safety Warning: Disconnect the negative battery terminal before starting. Work only on a cold engine to prevent severe burns. Ensure the parking brake is engaged.
Tools & Materials Needed
- New serpentine belt (Correct part for 3.8L V6)
- Serpentine belt routing diagram (See below)
- 1/2" drive ratchet or breaker bar
- Long cheater bar (pipe, approx. 18-24 inches for leverage) – Essential
- Gloves (Recommended)
Serpentine Belt Removal Steps
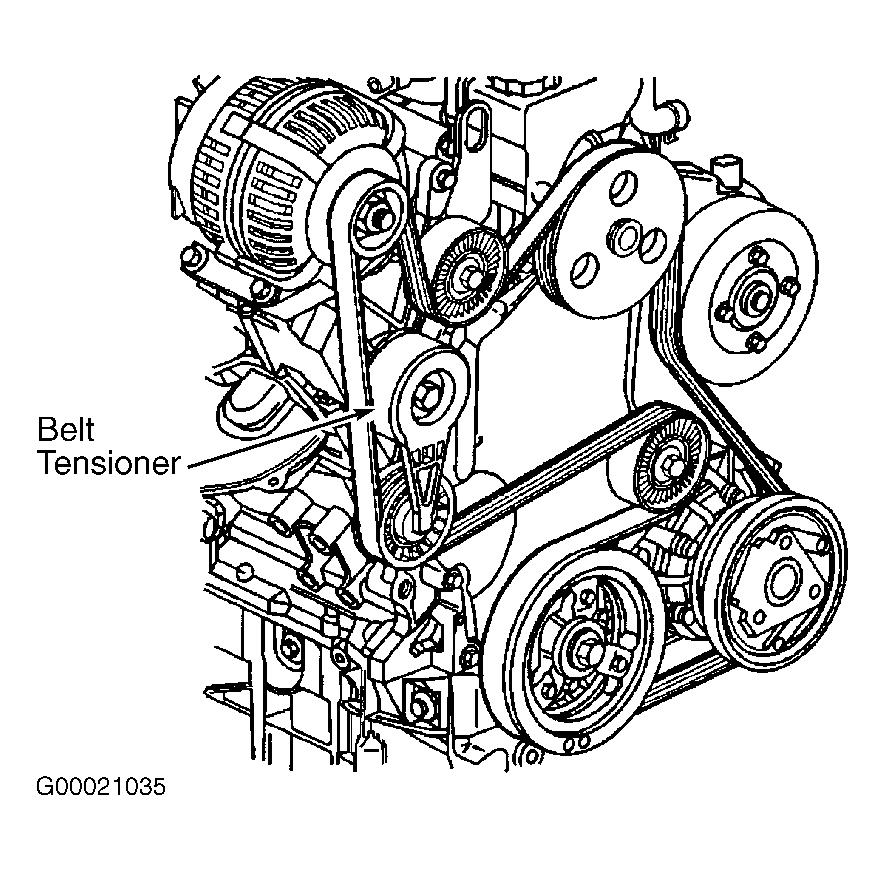
- Locate the spring-loaded belt tensioner pulley assembly. It's typically on the driver's side, above the alternator.
- Place the 1/2" drive ratchet/breaker bar socket onto the tensioner's square drive stud.
- Firmly rotate the tensioner clockwise (towards the front of the engine) using the cheater bar for leverage. This releases tension from the belt.
- While holding tension, carefully slip the old belt off one of the smooth pulleys (idler or tensioner pulley is easiest).
- Slowly release the tensioner and remove the old belt completely. Note the belt's path carefully.
Serpentine Belt Routing Diagram
Standard Configuration (Refer to this while installing):
- Crankshaft Pulley (Bottom center, largest)
- Alternator Pulley (Driver's side, above crank)
- Power Steering Pump Pulley (Passenger side, top)
- Air Conditioning Compressor Pulley (Passenger side, below PS pump)
- Tensioner Pulley (Driver's side, pushes against belt)
- Idler Pulley (Driver's side, often below tensioner) (Position may vary slightly)
Routing Order: Crankshaft -> A/C Compressor -> Idler Pulley -> Power Steering Pump -> Alternator -> Tensioner Pulley -> Back to Crankshaft. Verify against your engine bay or diagram sticker.
New Belt Installation Steps
- Position the new belt over all pulleys except the tensioner pulley, following the noted/diagrammed routing precisely.
- Place the ratchet/breaker bar back onto the tensioner's drive stud.
- Rotate the tensioner clockwise firmly using the cheater bar until there is enough slack to slip the belt onto the tensioner pulley.
- Carefully guide the belt onto the tensioner pulley groove.
- Slowly and completely release the tensioner to apply tension to the new belt.
Final Verification
- Double-check the belt is fully seated in the grooves of all pulleys.
- Reconnect the negative battery cable.
- Start the engine and observe the belt for a few seconds. It should run smoothly without squealing, flapping, or slipping.
- Inspect belt alignment on all pulleys again after a brief run.
Critical Tip: Correct routing is essential. If unsure, sketch the old belt's path before removal. Replacing a worn belt prevents breakdowns.