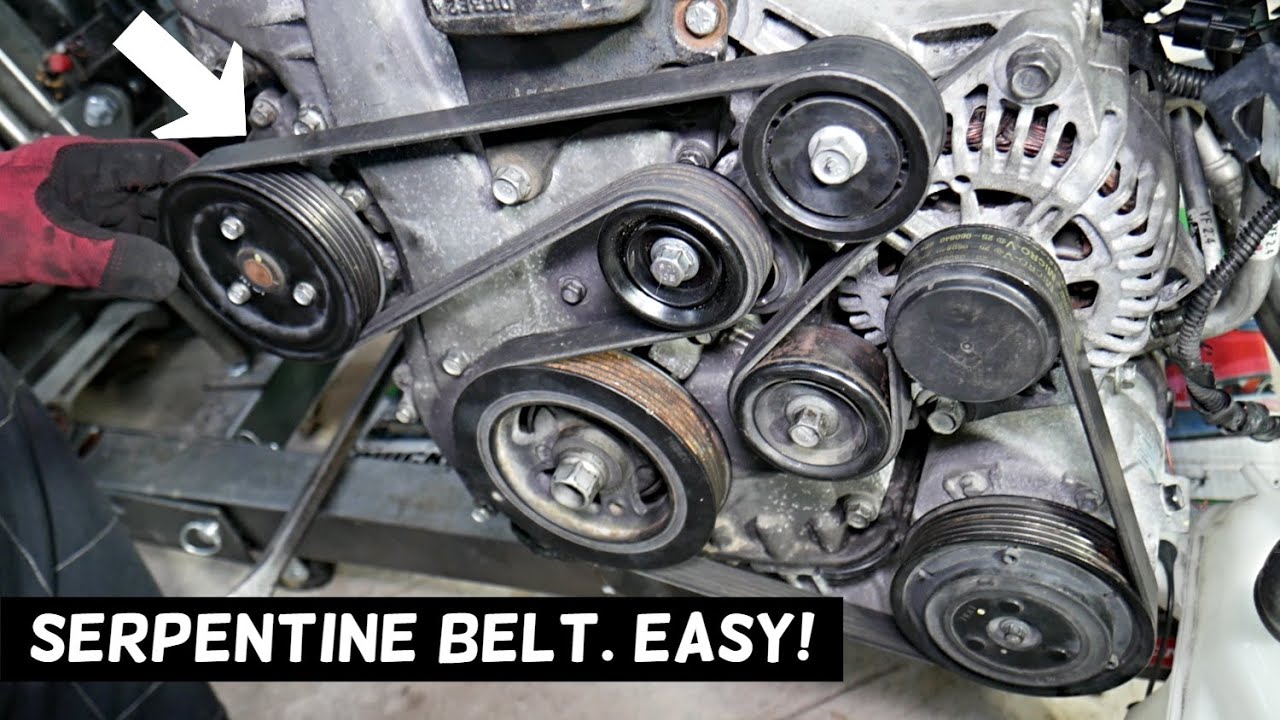
Accessory Drive Belt Diagram
For the 2013 Kia Optima 2.4L GDI engine, the accessory drive belt (serpentine belt) routing is precise and critical for reliable operation. Ensure the belt path is correct to prevent slippage or damage. The sequence follows a clockwise direction when viewed from the front of the engine:
- Start at the crankshaft pulley (lower position).
- Loop to the A/C compressor pulley (front-upper position).
- Proceed to the power steering pump pulley (mid-upper position).
- Advance to the alternator pulley (upper-rear position).
- Conclude at the automatic belt tensioner pulley (upper-front position), returning tension to maintain proper belt tightness.
Key details: The belt tensioner is spring-loaded; always inspect its smooth rotation during checks.
Quick Fix and Replacement Steps
To fix belt issues rapidly or replace the belt, follow these steps using standard tools:
- Relieve belt tension by rotating the tensioner pulley clockwise with a wrench (use the designated bolt on the tensioner assembly).
- Remove the worn belt carefully, referencing the diagram for exact routing confirmation.
- Install a new OE-spec belt (e.g., 6-rib design) in the prescribed sequence to avoid misalignment.
- Check and adjust tension: Apply moderate pressure to the belt midway between pulleys; deflection should not exceed 1/2 inch under light force.
Safety note: Always disconnect the battery negative terminal before service to prevent electrical hazards.