Locating motor mounts is critical for vibration control and powertrain stability. Here's a systematic DIY approach:
Primary Mount Identification
Most vehicles feature 3-4 mounts:
- Front/Lower Mount: Visible below radiator, attached to engine block and subframe
- Transmission Mount: Positioned under gearbox near firewall
- Torque Strut: Diagonal brace from cylinder head to chassis (front-wheel drive)
- Rear Mount: Between transmission and crossmember (rear-wheel drive)
DIY Location Mapping Procedure
Step 1: Access Preparation

Lift vehicle securely using jack stands. Remove plastic undertrays if present.
Step 2: Visual Tracing
Trace engine/transmission outlines towards contact points with chassis components. Mounts appear as:
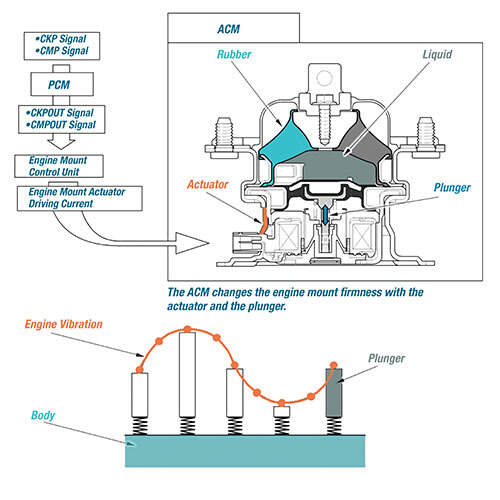
- Rubber or hydraulic cylinders (usually black)

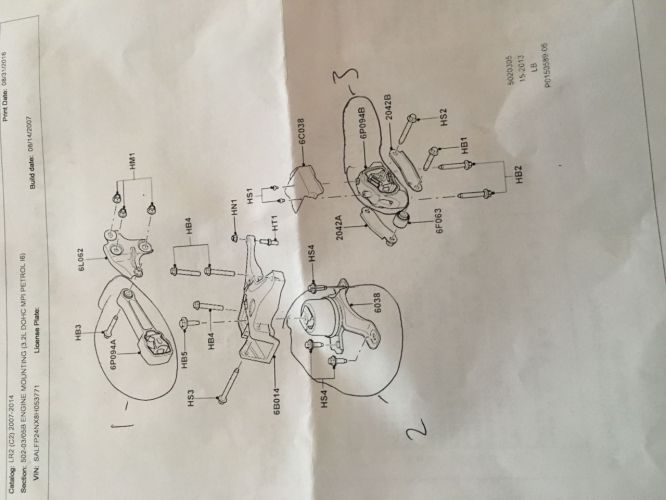
- Metal brackets connecting powertrain to frame
Step 3: Manufacturer Pattern Recognition
Engines typically mount at:
- Left/right sides of block's midpoint
- Transmission tailshaft support
- Top engine stabilizer near timing cover
Verification Methods
- Pry Bar Test: Gently lever engine upward at different points – mount flex reveals location
- Mirror Technique: Use inspection mirror around engine block's perimeter
- Degreasing: Clean engine surfaces – mounts appear cleaner with defined edges
Critical Safety Checks
After locating mounts:
1. Verify no hydraulic leaks (fluid marks around rubber)
2. Check bracket bolts for corrosion or shearing
3. Inspect rubber isolators for radial cracking
4. Confirm no metal-on-metal contact points