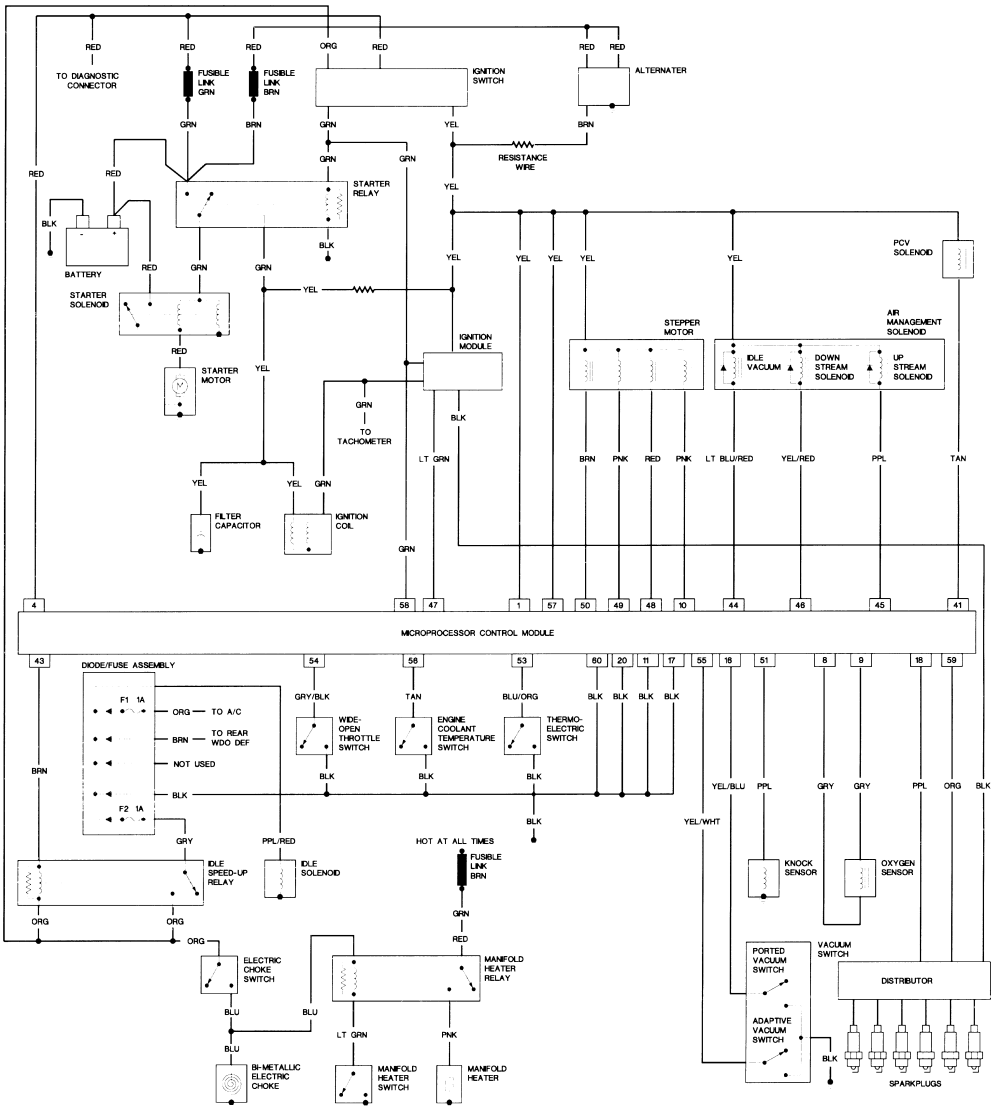
Checking fuel injector wiring connections on a 1994 Jeep Wrangler 2.5L engine ensures proper fuel delivery and prevents misfires or poor performance. Follow this concise guide for accurate diagnostics.
Preparation
Gather essential tools: a digital multimeter, test light, flashlight, and basic hand tools. Ensure safety first: disconnect the negative battery terminal before working on any electrical components. Refer to your vehicle's service manual for specific diagrams if needed.
Locate and Inspect Connections
Identify the fuel injector wiring harness near the intake manifold. Each injector connector has two wires. Physically check for visible issues:

- Look for signs of corrosion, fraying, or loose pins in connectors.
- Inspect for oil or debris accumulation.
Step-by-Step Testing Process
Use a multimeter for voltage and continuity checks:
- Reconnect the battery temporarily after ensuring safety.
- Turn the ignition to the "ON" position (engine off).
- Test for power: Set the multimeter to DC voltage. Probe the voltage supply wire (typically red or orange) at each injector connector. Expect 12V or battery voltage.
- Test for signal: Probe the control wire (usually dark blue or green). You should see a pulsed signal when cranking the engine briefly. Use a test light to observe flashing.
- Check continuity: With the battery disconnected, test continuity between each injector wire and its corresponding connection at the ECU or harness connector. Resistance should be near zero ohms.
Troubleshooting Common Issues
Address potential problems efficiently:
- No Voltage: Trace for open circuits or blown fuses.
- No Signal: Inspect the ECU connections or wiring harness integrity.
- Intermittent Faults: Clean corroded terminals with electrical contact cleaner and secure loose connectors.
Always retest after repairs to confirm stable connections. Replace damaged wires or harnesses if necessary for reliable operation.
