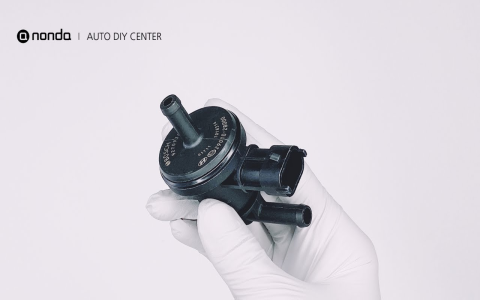
The Evaporative Emission Control System (EVAP) prevents fuel vapors from escaping into the atmosphere. The purge valve is a critical solenoid-operated component that controls the flow of these fuel vapors from the charcoal canister into the engine intake manifold for combustion.
Recognizing Purge Valve Failure Symptoms
Common symptoms indicating potential purge valve failure include:
- Check Engine Light illuminated (often with codes P0440, P0441, P0442, P0443, P0446, or similar).
- Rough idling or engine stalling, especially after refueling.
- Poor fuel economy.
- Difficulty starting the engine.
- Failed emissions test.
Diagnosing Before Replacement
Do not replace parts solely based on a Check Engine Light code. Confirm the valve is faulty using these methods:

- Functional Test: Remove the valve. Apply 12V power and ground to the electrical connector. A working valve should audibly "click". Test both open and closed states.
- Vacuum Test: Blow or suck through the ports (engine off, cold). In its resting state, one port path should be closed (or restricted), the other should be open/flow. When voltage is applied, the state should reverse.
- Resistance Check: Use a multimeter on the valve's electrical terminals. Resistance typically falls between 20-35 ohms (check vehicle specifics). An open or short circuit indicates failure.
- Scan Tool: Some advanced scan tools can command the valve to cycle during bi-directional testing.
Understanding Evap Purge Valve Costs
The cost difference between DIY and shop repair is significant:
- Parts Cost (DIY): $15 - $80 USD. The exact cost depends on vehicle make/model and brand (OEM vs. aftermarket).
- Shop Repair Cost: $150 - $350+ USD. This includes parts markup and 0.5 - 1.5 hours of labor ($90 - $175+ per hour typical).
Replacing the valve yourself typically saves $100 - $250+.
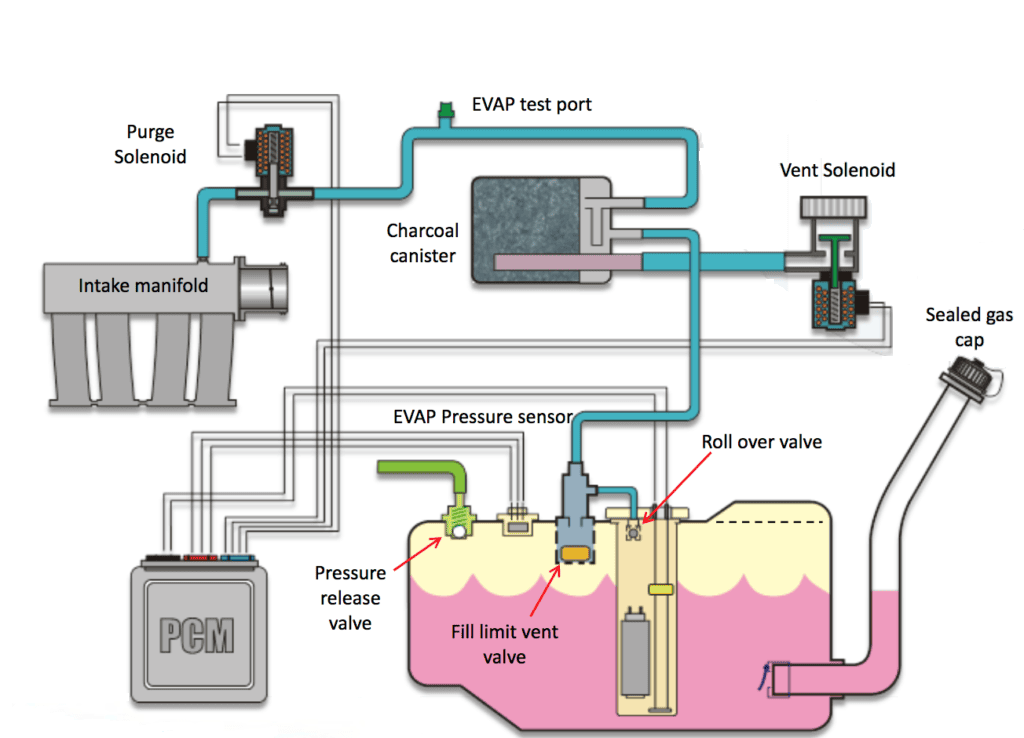
Locating the Valve & Understanding Diagrams
The purge valve location varies greatly by vehicle. Common locations include:
- Near the engine firewall.
- Attached to the engine intake manifold.
- Adjacent to the charcoal canister (often under the vehicle near the fuel tank).
How to use an EVAP Diagram:
- Vacuum Lines: Trace the small diameter rubber/plastic hoses running from the charcoal canister towards the engine. The purge valve sits inline between the canister and the intake manifold.
- Electrical Connector: The valve will always have a small electrical connector (typically 2 wires) plugged into it.
- Component Image: Diagrams show the valve symbol. Compare its appearance (shape, port count) and location relative to the canister and engine to the physical part in your vehicle.
Service Manuals or repair databases offer precise diagrams for your specific vehicle.
Purge Valve Replacement Steps
- Identify the valve location using diagram guidance.
- Disconnect the Negative Battery Terminal (Safety Precaution).
- Note hose routing carefully (take photos). Label hoses if needed.
- Disconnect the electrical connector.
- Use pliers to carefully release hose clamps or squeeze the quick-connect fittings.
- Disconnect the old valve.
- Connect the new valve precisely matching the hose routing to the old valve.
- Ensure all hose connections are tight and secure.
- Reconnect the electrical connector.
- Reconnect the negative battery cable.
Post-Installation: Start the engine. Scan for codes and clear the Check Engine Light (it may take a few drive cycles to clear). Monitor driveability.
Essential Safety Precautions
- Work in a well-ventilated area.
- Allow the engine to cool completely before starting.
- Wear safety glasses.
- Disconnect the negative battery terminal to prevent electrical shorts.
- Handle plastic fittings and vacuum lines with care to avoid breakage.