Why Check the Fuse Layout First
Always start with the fuse layout diagram to pinpoint exact fuse locations quickly. Skipping this step risks misdiagnosis, wasted time, and potential damage. For a 1995 Ford Explorer, fuse issues often stem from blown fuses in key circuits like lights or accessories. The diagram provides accurate labels and amperage details.
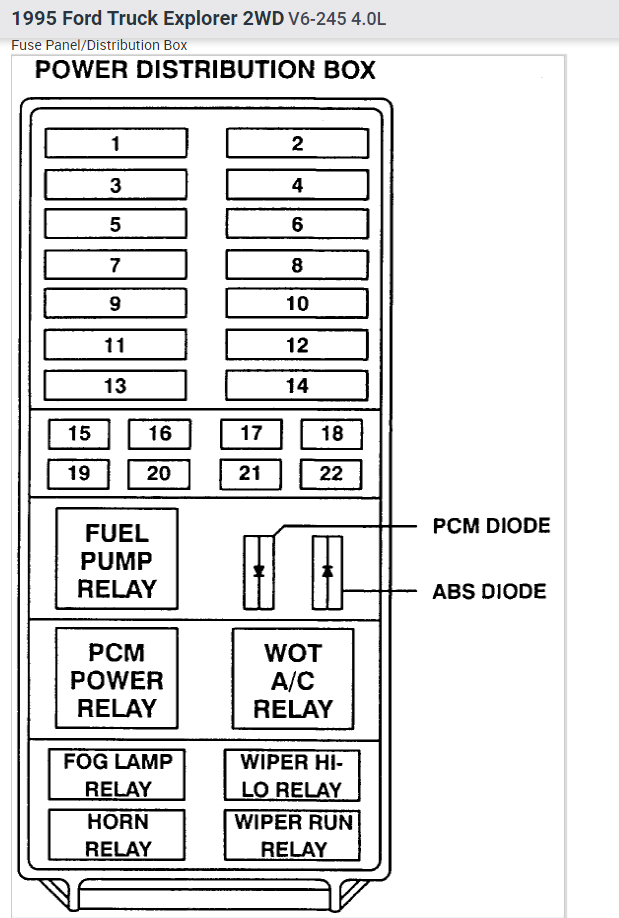
Locate the Fuse Boxes
Two main fuse boxes exist:
- Interior Fuse Panel: Situated under the dashboard, usually near the driver or passenger footwell. This handles cabin systems like wipers or radio.
- Engine Bay Fuse Box: Found close to the battery or firewall. It manages critical components such as headlights or fuel pump.
Using the Layout Diagram Effectively
Refer to the diagram—typically printed on the fuse box cover or in the owner's manual—to identify fuse numbers, symbols, and amperage ratings. Match these to symptoms, ensuring you test the correct fuse without guessing.
Step-by-Step Diagnostic Process
- Step 1: Access the fuse layout and identify the fuse for your malfunctioning system using the diagram.
- Step 2: Remove the fuse and inspect it visually or with a test light for breaks, burns, or discoloration.
- Step 3: If blown, replace it with an identical amperage fuse. Never use a higher-rated fuse to avoid electrical fires.
- Step 4: Test the system after replacement. If issues persist, investigate deeper wiring or relay problems.