Diagnosing Dead Gauges with a Wiring Diagram
Dead gauges often result from electrical faults, and using your instrument panel wiring diagram accelerates diagnosis. Begin by confirming you have the correct diagram for your specific vehicle model.
Essential Steps for Quick Repair
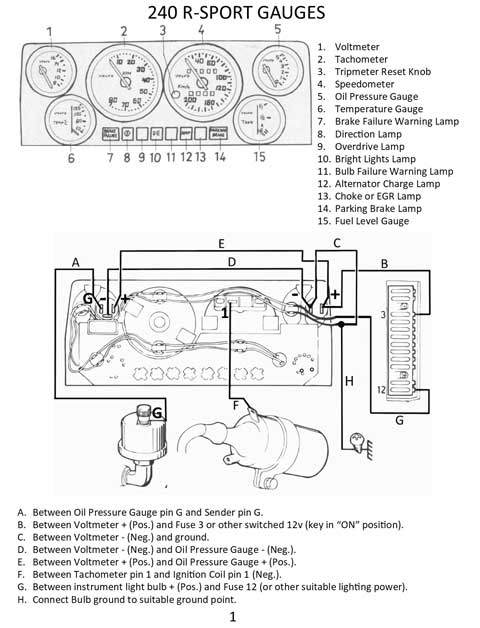
- Step 1: Locate the diagram in your vehicle's service manual to identify gauge circuits.
- Step 2: Pinpoint the failed gauge on the diagram and trace its wiring paths for power, ground, and sensors.
- Step 3: Check related fuses first; blown fuses are common culprits—refer to the diagram for fuse positions.
- Step 4: Inspect connectors and wires for damage, corrosion, or loose fits using diagram labels for guidance.
- Step 5: Test circuits with a multimeter: measure voltage at key points per the diagram to isolate faults.
Key Safety Measures
Always disconnect the battery before working on electrical systems to avoid shocks or short circuits.
Efficient Troubleshooting Tips
Focus on high-probability issues: poor grounds or sensor failures. Compare live readings to diagram specifications for swift resolution.
Methodically applying the wiring diagram minimizes guesswork, enabling fast gauge restoration in minutes rather than hours.