
Persistent serpentine belt noise on your 2010 Nissan Altima usually indicates wear, misalignment, improper tension, or a failing component. Addressing it promptly prevents belt failure and potential damage to accessories. Access requires removing the passenger side front wheel and plastic inner fender splash shield.
Required Tools & Safety
- New Serpentine Belt: Ensure it's the correct type and length (e.g., Gates K060875).
- Serpentine Belt Tensioner Wrench / Socket: 19mm socket for the tensioner square drive.
- Socket/Wrench Set: Primarily 10mm, 12mm, 14mm.
- Torque Wrench
- Gloves & Safety Glasses
Caution: Engine must be OFF and COOL. Disconnect the NEGATIVE battery terminal.
2010 Nissan Altima (2.5L QR25DE Engine) Serpentine Belt Routing Diagram
The belt path wraps around six pulleys in this sequence:
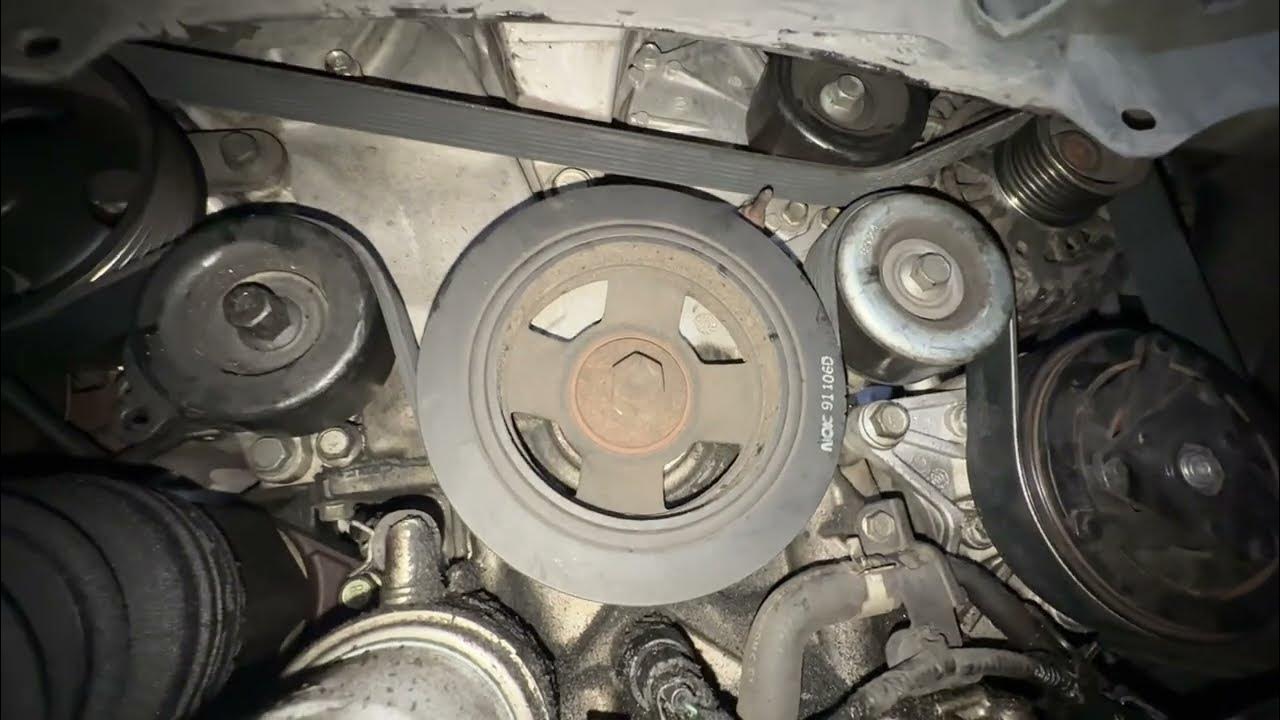
- Crankshaft Pulley (Bottom, Large)
- Air Conditioning Compressor Pulley (Above Crankshaft, Right)
- Idler Pulley (Top Center)
- Power Steering Pump Pulley (Left of Idler)
- Alternator Pulley (Left of Power Steering Pump)
- Automatic Tensioner Pulley (Bottom Left, Spring-Loaded)
- Water Pump Pulley (Below Alternator/Tensioner, Driven by belt backside)
Key Routing Notes: The belt rides on the OUTER groove of the Crankshaft Pulley. It wraps AROUND the A/C Compressor (outer groove), Idler (outer), Power Steering (outer), and Alternator (outer) pulleys. The belt passes UNDER the Automatic Tensioner Pulley (riding on its outer groove). Crucially, the BACKSIDE (smooth side) of the belt rides on the Water Pump Pulley.
Fixing Belt Noise: Step-by-Step
- Inspect Thoroughly: Before removal, examine the old belt. Check for severe cracking (>3 cracks per inch), missing ribs, glazing (shiny surfaces), fraying, or significant chunks missing. Listen while the engine runs (briefly and carefully) to isolate the noise location. Also, inspect ALL pulleys for wobble, bearing noise (growling), excessive residue buildup, or damage.
- Release Belt Tension:
- Locate the spring-loaded automatic tensioner assembly. The pivot point is near the alternator.
- Insert the 19mm socket onto the tensioner's square drive stud.
- Using a breaker bar or ratchet, rotate the tensioner CLOCKWISE (toward the front of the car) against its spring pressure to create slack. You can also sometimes access it with a long 19mm wrench from above.
- Remove Old Belt: Slip the belt off one of the easily accessible pulleys (like the smooth idler or alternator pulley). Carefully note its exact routing path using the diagram above.
- Check Pulleys & Tensioner:
- Manually spin each pulley (idler, tensioner, A/C, P/S, Alternator). They should spin smoothly with minimal resistance and no grinding, growling, or roughness.
- Check for significant side-to-side wobble on any pulley.
- Clean pulleys of any oil, coolant, or debris using brake cleaner and a rag (ensure cleaner is safe for rubber/plastic).
- Inspect the tensioner itself. Its arm should move smoothly through its range when leverage is applied and released. The pulley bearing should be quiet. Significant wobble or noise requires tensioner replacement.
- Verify the water pump pulley is secure and the alternator/PS brackets are tight.
Failing pulleys or tensioners are a common cause of noise and MUST be replaced if faulty.
- Install New Belt:
- Refer precisely to the routing diagram above.
- Start by placing the new belt onto all pulleys EXCEPT the tensioner pulley. Ensure the belt is fully seated in the grooves of the Crankshaft, A/C, Idler, P/S, and Alternator pulleys.
- Water Pump Pulley: Ensure the SMOOTH backside of the belt contacts the water pump pulley.
- Rotate the tensioner CLOCKWISE again to create enough slack.
- Slide the belt onto the OUTER GROOVE of the tensioner pulley.
- Slowly and carefully release the tensioner, allowing it to apply tension to the new belt. Double-check the belt is correctly seated in ALL grooves.
- Final Checks:
- Visually confirm the belt is correctly routed on every pulley.
- Reconnect the battery negative terminal.
- Start the engine and observe the belt running for at least 30-60 seconds. Listen carefully for squeaks, chirps, or whines.
- Inspect belt tracking; it should run centered on all pulleys without walking off.
- Turn on A/C (high blower) and headlights (high beam) to load the system and check for noise under load.
- Turn steering wheel lock-to-lock to load the power steering.
Troubleshooting Persistent Noise
- Chirping/Squealing (esp. at startup/cold): Often misalignment, contaminated belt/pulleys (oil, coolant), or improper tension. Re-check routing, pulley condition, and cleanliness.
- Squealing Under Load (A/C, PS): Weak tensioner (not applying enough tension), glazed belt, or failing accessory bearing (A/C Compressor, Alternator).
- Constant Whirring/Growling: Indicates a failing pulley bearing (Idler or Tensioner pulley most common). Requires bearing or pulley replacement.
- Slapping/Flapping: Loose belt (tensioner failure) or severely damaged belt.
Critical Note: Proper tension is applied solely by the automatic tensioner. Do not attempt to manually over-tension by prying. If noise persists after belt replacement and confirming pulley/component health, the tensioner assembly itself may need replacement.