
Installing a Ford turn signal switch requires precise wiring connections. Follow these steps using your vehicle-specific wiring diagram:
Tools Required
- Wire strippers/crimpers
- Multimeter
- Electrical tape/heat shrink tubing
- Torx/Phillips screwdrivers
- Ford-specific wiring diagram
Installation Steps
1. Disconnect Battery: Remove negative battery terminal first to prevent short circuits.
2. Remove Steering Column Covers: Unscrew lower and upper column shrouds using appropriate screwdriver. Set screws aside safely.
3. Access Turn Signal Switch:
- Detach switch electrical connector
- Remove switch mounting screws (typically Torx type)
- Carefully slide out old switch assembly
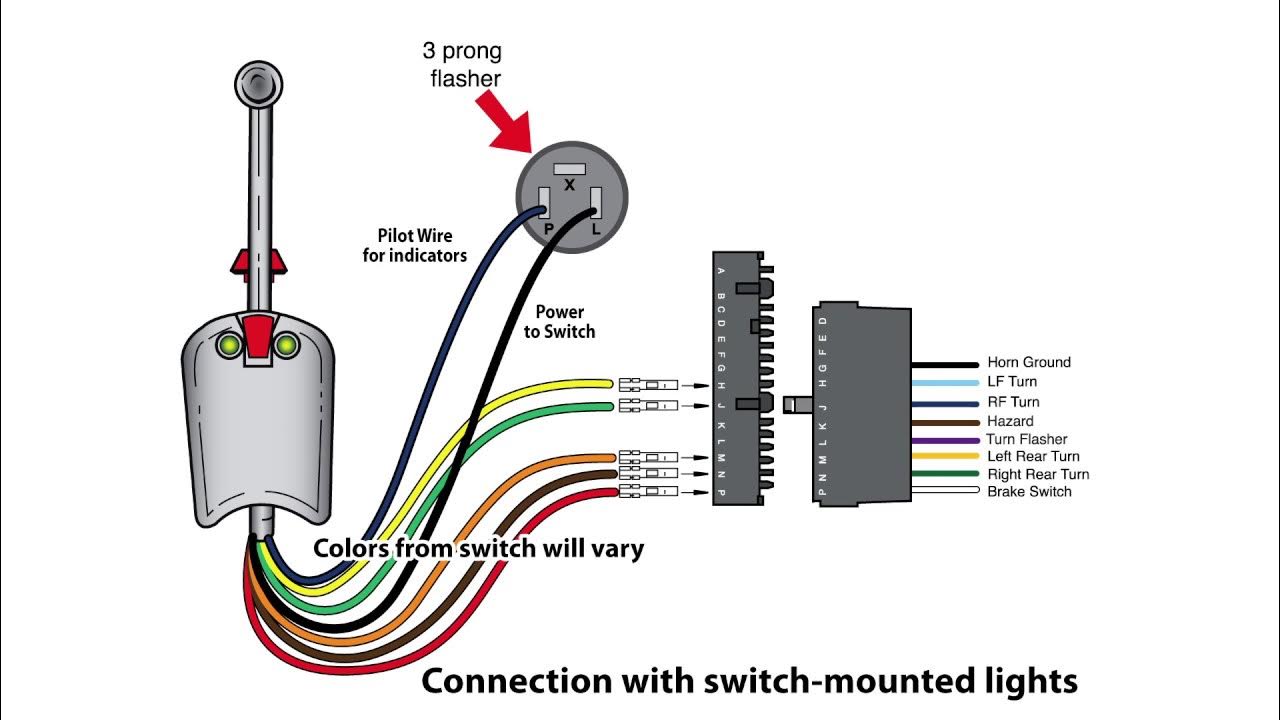
4. Wiring Connections:
- Match wire colors from new switch to vehicle harness per diagram
- Connect key wires:
- Flashing power: Typically green wire
- Left turn: Yellow/blue stripe
- Right turn: Green/orange stripe
- Hazard feed: Red/blue stripe
- Ground: Black wire
- Secure connections with crimp connectors and insulate with heat shrink
5. Switch Installation:
- Position new switch in column housing
- Reinstall mounting screws to specified torque
- Route wires without kinks or pinching
6. Testing:
- Reconnect battery
- Verify operation without steering wheel installed
- Test left/right signals, hazards, and cancel function
- Check for hyper-flashing indicating bulb mismatch
Final Assembly: Reinstall column covers and steering wheel. Perform final road test.

Safety Notes
- Always confirm wire functions with multimeter before connection
- Reference exact model/year wiring diagram (colors vary by Ford model)
- Ensure clock spring alignment during reassembly to prevent damage