How to Find Starter Solenoid Wires with Easy Wiring Diagram
Locating starter solenoid wires requires identifying specific connections on the solenoid itself. Follow these steps safely.
Safety First
Always disconnect the negative battery cable before starting. Wear safety glasses and gloves. Work in a well-lit area. Ensure the vehicle is in Park (Automatic) or Neutral (Manual) with the parking brake engaged.
Essential Tools & Preparation
Multimeter or Test Light
Vehicle Wiring Diagram (consult the service manual)
Wire Brush or Sandpaper
Marker Tags or Tape (for labeling)
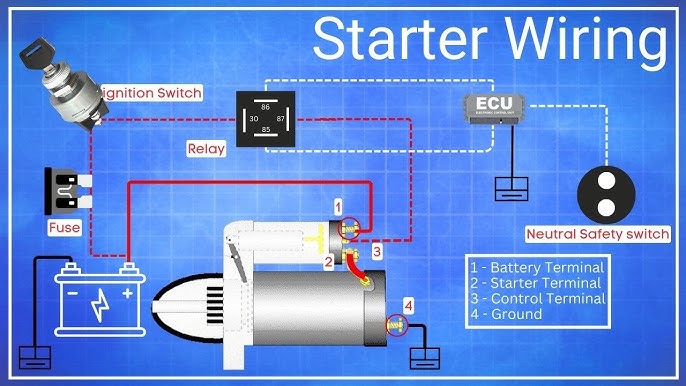
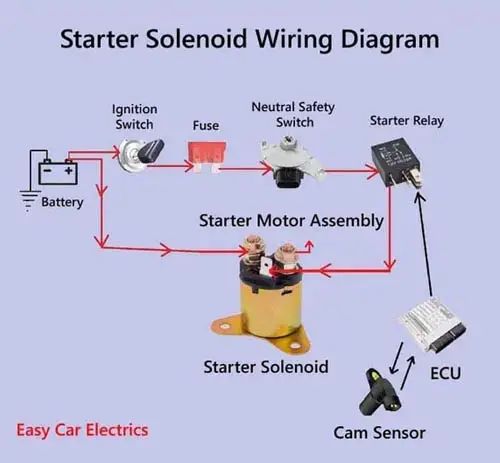
Identify the starter solenoid location. It is typically mounted directly on the starter motor in modern vehicles or separately on the fender in some older models.
Identifying Wires (3 or 4 Terminal Solenoids)
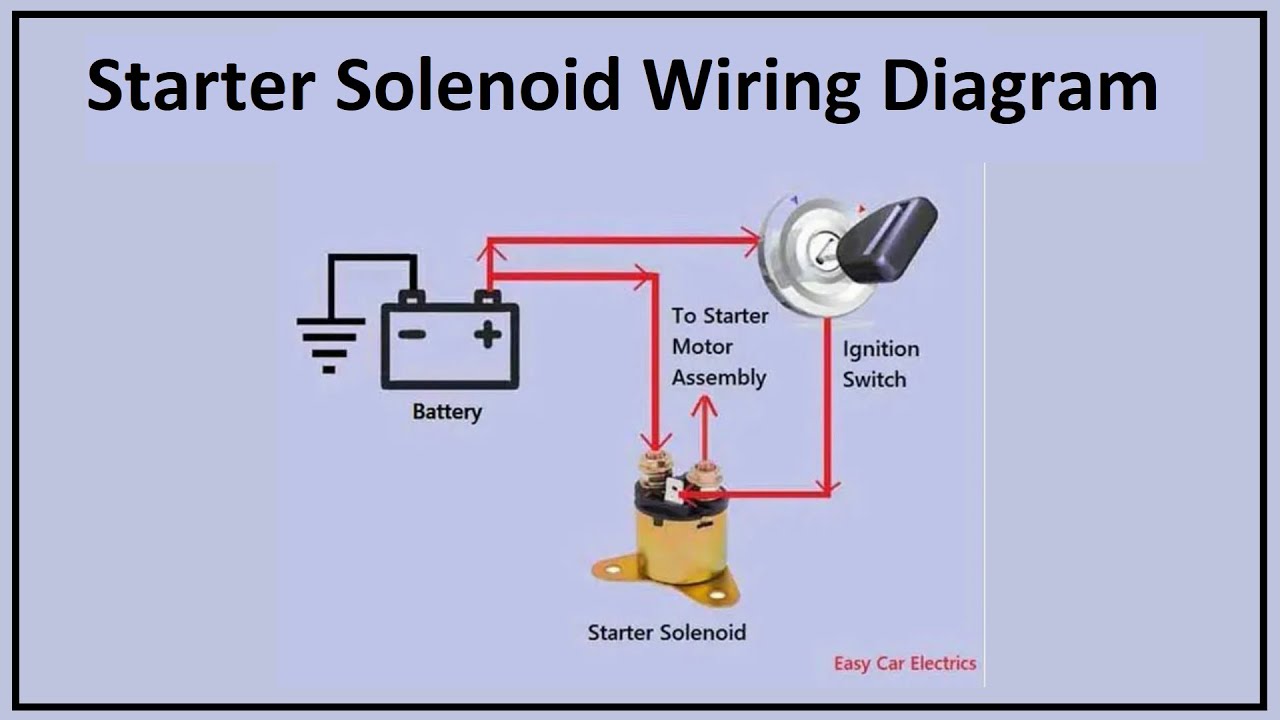
Step 1: Locate the Large Battery Cable.
This is the thickest cable connected directly to the battery's positive terminal.
It attaches to one large terminal post on the solenoid.
Mark this as "BAT".
Step 2: Identify the Starter Motor Output Cable.
Trace the other large cable leaving the solenoid; it runs directly to the starter motor body.
This terminal post is usually opposite or adjacent to the BAT terminal.
Mark this as "S" (Starter Motor).
Step 3: Find the Ignition Switch Control Wire ("S" Terminal).
Look for a smaller gauge wire connected to a smaller terminal on the solenoid.
Use your multimeter/test light: With ignition key turned to "START" (and battery connected), this wire should show +12V only during cranking.
Mark this as "IGN" or "S".
Step 4: Identify the Constant Power Wire ("I" Terminal, if present).
If a fourth smaller terminal exists, it may provide +12V to the ignition coil during cranking (older vehicles with points distributors).
Verify with multimeter: It should have +12V only while cranking (like the IGN wire).
Mark this as "I" if confirmed.
Easy Wiring Diagram Reference
Use this simplified diagram to match your findings:
(Drawn representation showing connections)
BATTERY POSITIVE (+) ────> ┌────────┐ ────> STARTER MOTOR