
Replacing the serpentine belt on a 3.6L 2013 Chevy Impala requires proper routing and tensioner manipulation. Follow these steps precisely:
Tools Required
- 15mm wrench or socket
- New GM 6PK2280 belt (or equivalent)
- Gloves and eye protection
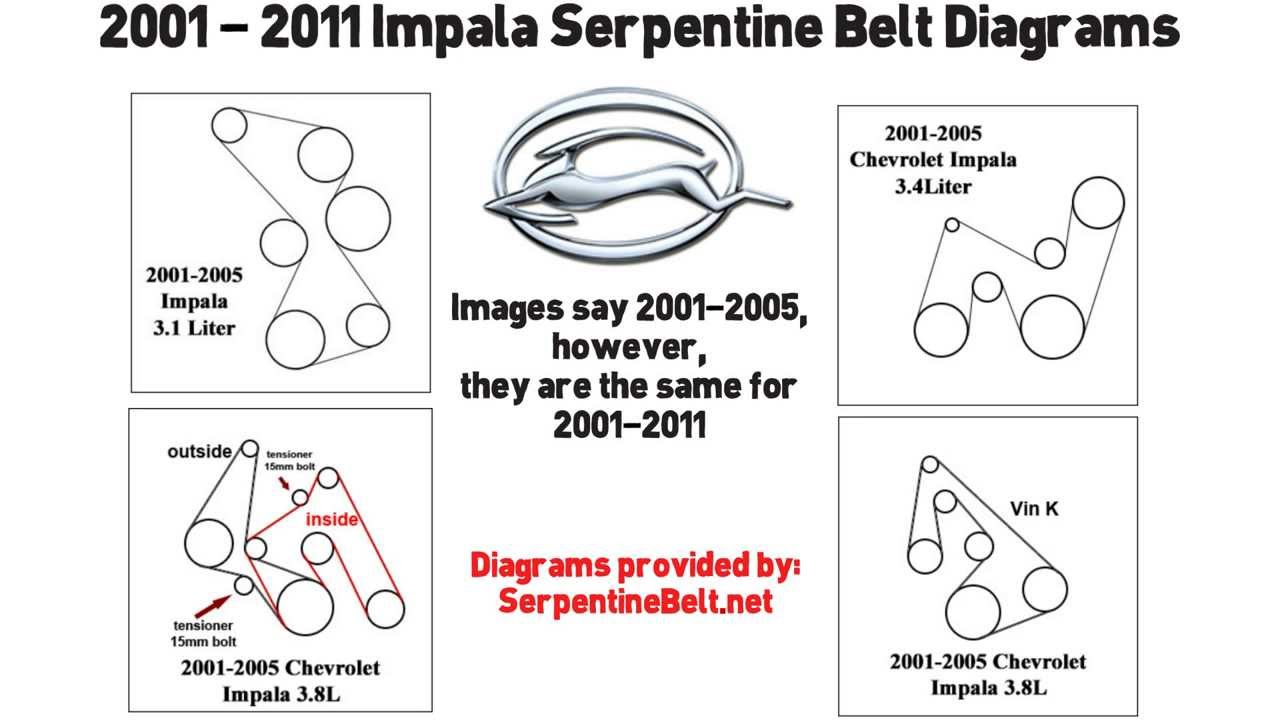
Belt Routing Diagram
The belt path follows this sequence (counter-clockwise from tensioner):
- Crankshaft pulley (center bottom)
- A/C compressor (passenger side)
- Idler pulley (upper passenger side)
- Power steering pump (driver side)
- Alternator (center top)
- Tensioner pulley (driver side)
Installation Procedure
Step 1: Release tension

Locate the spring-loaded tensioner pulley on the driver's side. Fit the 15mm wrench onto the tensioner pulley bolt. Rotate clockwise against spring pressure to relieve belt tension.
Step 2: Remove old belt
Slip the worn belt off the pulleys while maintaining tensioner pressure. Release the tensioner slowly after removal.
Step 3: Install new belt
Route the new belt over all pulleys except the tensioner. Recheck diagram position, particularly between power steering pump and alternator. Engage tensioner bolt with wrench and rotate clockwise again. Slide belt onto tensioner pulley last.
Step 4: Verify installation
Slowly release tensioner. Ensure belt is fully seated in all pulley grooves without twisting. Start the engine briefly and confirm no slippage or unusual noises.
Critical Tips
- Never pry against tensioner components – use rotational force only
- Inspect all pulleys for wobble, bearing noise or damage before installation
- Confirm belt ribs align parallel with pulley grooves after installation