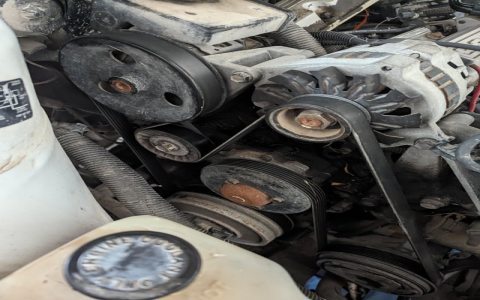
Locate the under-hood serpentine belt routing diagram, typically affixed to the radiator support or strut tower. Refer exclusively to this diagram for correct path and tensioner location. Verify replacement belt P/N 6K895 matches OEM specifications.
Tools & Materials Required
- New Serpentine Belt (GM P/N 6K895 or equivalent)
- 1/2" Drive Breaker Bar or Serpentine Belt Tool
- Safety Glasses
- Work Light
Installation Procedure
Relieve Tension: Position breaker bar on 15mm tensioner pulley bolt. Rotate tensioner clockwise (towards engine front) until sufficient slack exists. Remove old belt immediately.
Route New Belt: Following the diagram meticulously, thread the new belt onto all pulleys except the tensioner pulley. Ensure ribs engage correctly in all grooves.

Apply Final Tension: Re-engage breaker bar on tensioner. Rotate clockwise again to create maximum slack. Slide belt onto tensioner pulley. Slowly release tensioner until fully engaged.
Verification:
- Cross-check belt routing against diagram twice.
- Ensure belt is centered on all pulleys with no ribs off-track.
- Manually rotate crankshaft 2 full revolutions using 15/16" socket to confirm smooth operation.
Critical Notes
The tensioner requires significant force (≈100 ft-lbs preload). Do NOT use pliers. Improper routing destroys accessories instantly. Replace tensioner if spring force feels weak or pulley bearings are noisy.