Preparation and Safety
Gather essential tools before starting: bearing puller or slide hammer, bearing installer kit, grease, clean cloths, torque wrench, and personal protective equipment. Ensure the vehicle is securely lifted on jack stands, battery disconnected, and transmission accessible.
Step-by-Step Installation Guide
- Remove the transmission – Detach clutch linkage and bolts to slide out the transmission, exposing the flywheel.
- Extract the old bearing – Use a pilot bearing puller attached to a slide hammer to carefully remove the bearing from the crankshaft bore.
- Clean the bore – Wipe the crankshaft bore with a lint-free cloth to eliminate debris and old grease, ensuring a smooth surface.
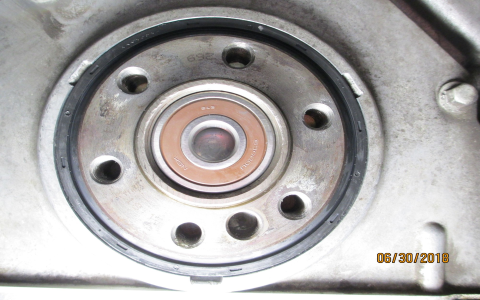
- Install the new bearing – Apply light grease to the bearing's outer surface. Align and press it in with a bearing installer tool, tapping gently until fully seated and flush.
- Reassemble components – Remount the clutch disc and pressure plate with manufacturer-specified torque. Reinstall the transmission and reconnect all linkages.
Final Checks – Verify smooth clutch operation by starting the engine and testing pedal engagement before lowering the vehicle.