
Reading a 4.6L V8 engine belt diagram requires identifying key components systematically. Follow these steps for clarity:
Locate the Diagram Components
Find the diagram sticker under the hood or consult your manual. Identify these standard elements:
- Crankshaft Pulley: Largest pulley at bottom center, drives the entire system.
- Idler Pulleys: Smooth non-driven wheels marked "Idler" or "I".
- Tensioner Pulley: Spring-loaded arm with indicator marks for belt slack.
- Accessory Pulleys: Alternator (GEN), Power Steering (PS), Water Pump (WP), A/C Compressor (AC).
Decipher Routing Symbols
Interpret visual cues:
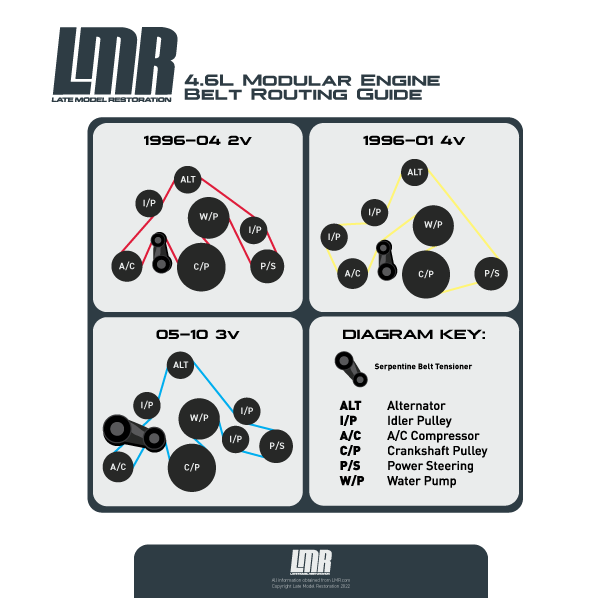
- Arrows: Indicates belt direction around pulleys (clockwise/counterclockwise).
- Dashed Lines: Shows belt path behind other components.
- Numerical Order: Diagrams often number pulley sequence (e.g., "Start at 1 → 2 → 3").
Trace the Belt Path
Follow this standard sequence for most 4.6L engines:
- Start at crankshaft pulley (primary driver).
- Route over water pump pulley (top center).
- Pass around idler pulley(s) (varies by model year).
- Engage tensioner pulley (apply pressure to slacken during installation).
- Loop through accessory pulleys in labeled order (GEN/PS/AC).
Verification Tips
- Match groove direction – ribs on belt must align with pulley grooves.
- Confirm tensioner mark aligns with "OK" range after installation.
- Rotate crank pulley 2 full revolutions by hand to check for misalignment.
Final check: All pulleys should contact the belt's ribbed side except smooth backside idlers. Consistent tension across all spans indicates correct routing.