
Understanding a Honda Civic under the hood diagram requires identifying key components step by step for safety and maintenance. This guide uses simple language and focuses on visual recognition.
Step 1: Review Safety Precautions
Ensure the engine is cool to prevent burns, wear gloves, and park on level ground. Never smoke or have open flames nearby.
Step 2: Locate and Reference the Diagram
Find the official diagram in your owner's manual or on a sticker under the hood. It typically labels components with arrows or numbers. Always cross-check for your Civic's model year.
Step 3: Identify Major Components
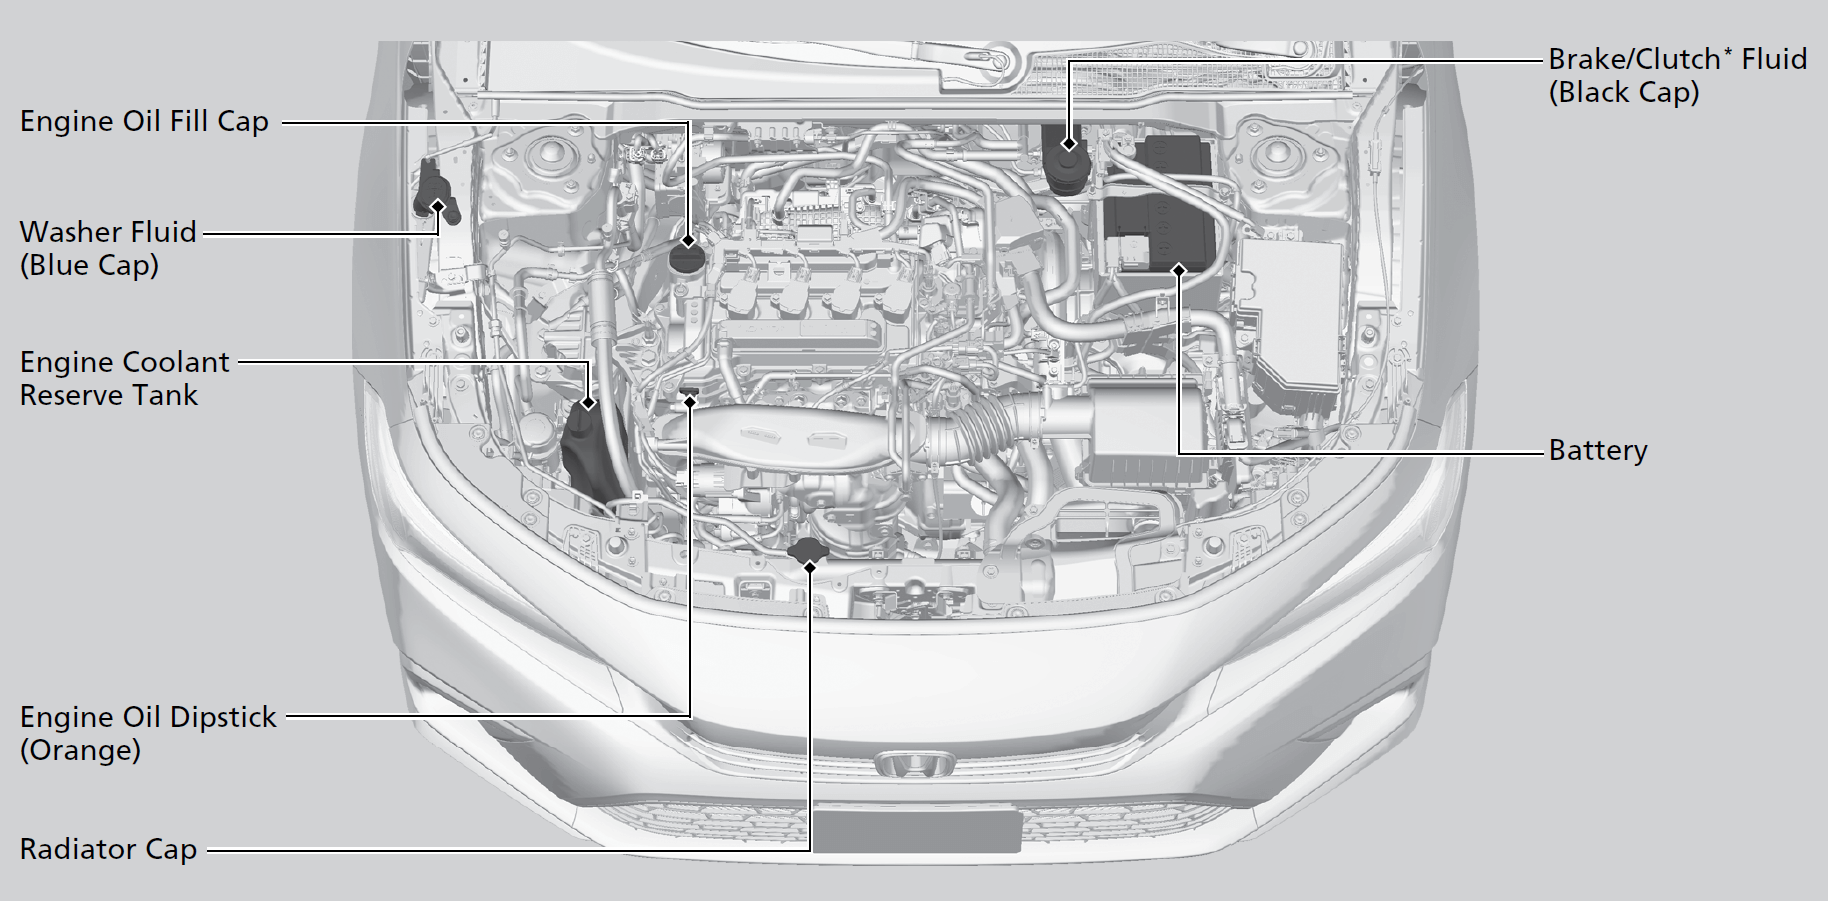
Start with the most critical parts to avoid confusion. Use the diagram symbols:
- Engine: Marked as a block with oil cap and belts; often the central feature.
- Battery: Shown with terminals (+) and (-), usually near the front.
- Fluid Reservoirs: Look for labeled caps—e.g., coolant radiator, brake fluid reservoir.
- Air Filter Box: Depicted with arrows indicating airflow, often near the battery.
- Fuse Box: Symbolized with lightning icons, commonly driver-side.
Step 4: Decode Symbols and Labels
Interpret common diagram elements:
- Dotted lines or arrows show fluid flow direction, like from the radiator cap to the overflow tank.
- Numbered dots correspond to keys in the manual for parts like spark plugs.
- Color codes—red for hot components—indicate high-risk areas to avoid touch.
Step 5: Apply for Routine Checks
Refer to the diagram during maintenance, such as topping off fluids. Focus on symbols to ensure proper handling and consult professional help for complex issues.