Squealing from your 2006 Honda CR-V typically indicates a drive belt issue: looseness, wear, misalignment, or contamination. Addressing it promptly prevents belt failure and accessory loss. Follow these steps:
Diagnose the Noise
- Cold Start & Damp Conditions: Squeal on startup or damp mornings often points to loose belt tension or glazing.
- Persistent Squeal: Continuous noise under load (A/C, steering) suggests severe wear, contamination, or accessory bearing problems.
- Locate Source: Use a mechanic's stethoscope (carefully) near each pulley to pinpoint if a specific bearing is failing. Warning: Keep loose clothing/hair away from moving belts.
Inspect the Drive Belt
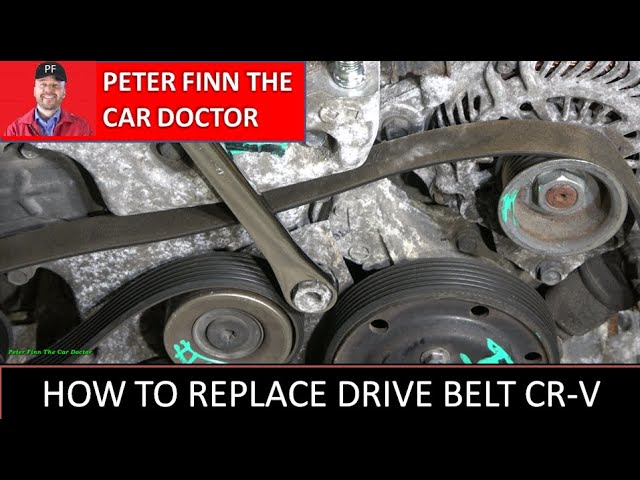
Locate the single serpentine belt running around the engine pulleys.
- Check Tension: Press midway on the longest belt span. It should deflect ≈½ inch (≈13mm). Excessive deflection means loose.
- Examine Condition: Look for:
- Cracks on ribs (especially deep ones)
- Glazing (shiny surface)
- Chunks missing
- Frayed edges
- Contamination (oil, coolant) – identify and fix leak source.
Replace the belt if significant wear is present.
- Inspect Pulleys: Look for misalignment, damaged grooves, seized bearings, or debris buildup.
Understand the Drive Belt Routing Diagram
- Locate Diagram: Find the label usually attached to the radiator support or hood underside. If missing, consult an official Honda service manual.
- Identify Components: Match pulleys on the engine to the diagram:
- Crankshaft Pulley (Center, large)
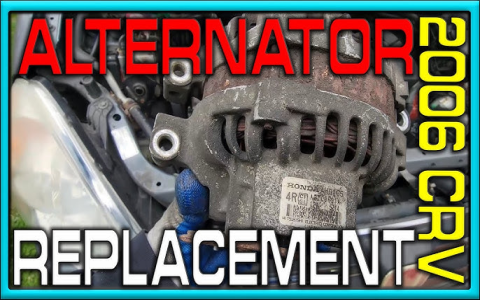
- Alternator
- Power Steering Pump
- Air Conditioning Compressor
- Automatic Tensioner Pulley
- Idler Pulley(s) (if applicable)
- Trace the Path: Memorize or draw the exact route the belt takes around each pulley. Routing is critical for correct installation.
Adjust Belt Tension (If Loose)
The 2006 CR-V uses an automatic belt tensioner (spring-loaded).
- Identify Tensioner: Locate the spring-loaded tensioner pulley. It has a distinct hex/square drive point.
- Relieve Tension: Insert a suitable wrench or socket onto the tensioner drive point. Rotate it slowly against the spring pressure (direction usually indicated on tensioner housing) to move the pulley away from the belt, creating slack. Do not force it excessively.
- Inspect Belt Further: With tension relieved, re-check belt condition thoroughly and inspect tensioner pulley bearing for roughness/noise.
- Release Tensioner: Slowly allow the tensioner arm to move back. Do not let it snap back.
- Test: Restart the engine. If squeal persists only momentarily or is reduced but belt is good, the tensioner spring might be weakening (consider replacement).
Replace the Drive Belt
- Engine Off & Cool: Ensure the engine is off and cool.
- Relieve Tension: Insert wrench onto tensioner drive point and rotate slowly against spring pressure to create maximum slack.
- Remove Belt: Slip the old belt off one pulley (usually the easiest one, like the alternator) and carefully work it off the remaining pulleys. Do not damage pulleys.
- Compare Old & New: Ensure the new belt (Honda part 38920-PNA-A01 or quality aftermarket) matches the old belt's length and rib count.
- Consult Diagram: Refer to the drive belt routing diagram to confirm the exact path.
- Install New Belt: Start by routing the belt onto the crankshaft pulley. Then, route it precisely according to the diagram around all other pulleys, except the tensioner pulley. Double-check the routing against the diagram. Ensure it seats properly in every pulley groove.
- Apply Tension: While holding the new belt on all pulleys except the tensioner pulley, slowly rotate the tensioner again to create slack and slip the belt onto the tensioner pulley. Ensure it seats properly.
- Release Tensioner Slowly: Allow the tensioner arm to return slowly to its position, applying tension to the belt.
- Double-Check Routing: Visually compare the installed belt's path with the routing diagram twice. Ensure no ribs are riding out of a pulley groove.
Final Steps
- Run Engine: Start the engine and observe the belt for stable operation.
- Listen: The squeal should be gone. A brief chirp on first start is possible as the belt settles.
- Inspect: Visually confirm the belt is tracking correctly and not jumping pulleys.
Preventive Maintenance
Inspect the drive belt condition and tension every oil change. Replace belts proactively every 60,000-100,000 miles depending on condition.