
Locating the correct belt routing for your 2010 Nissan Altima is essential for proper accessory drive or engine timing function. Diagrams differ significantly between the serpentine (accessory) belt and the timing belt/chain. Identify which belt you require.
Serpentine Belt Diagram (Accessory Drive Belt - 2.5L QR25DE Engine)
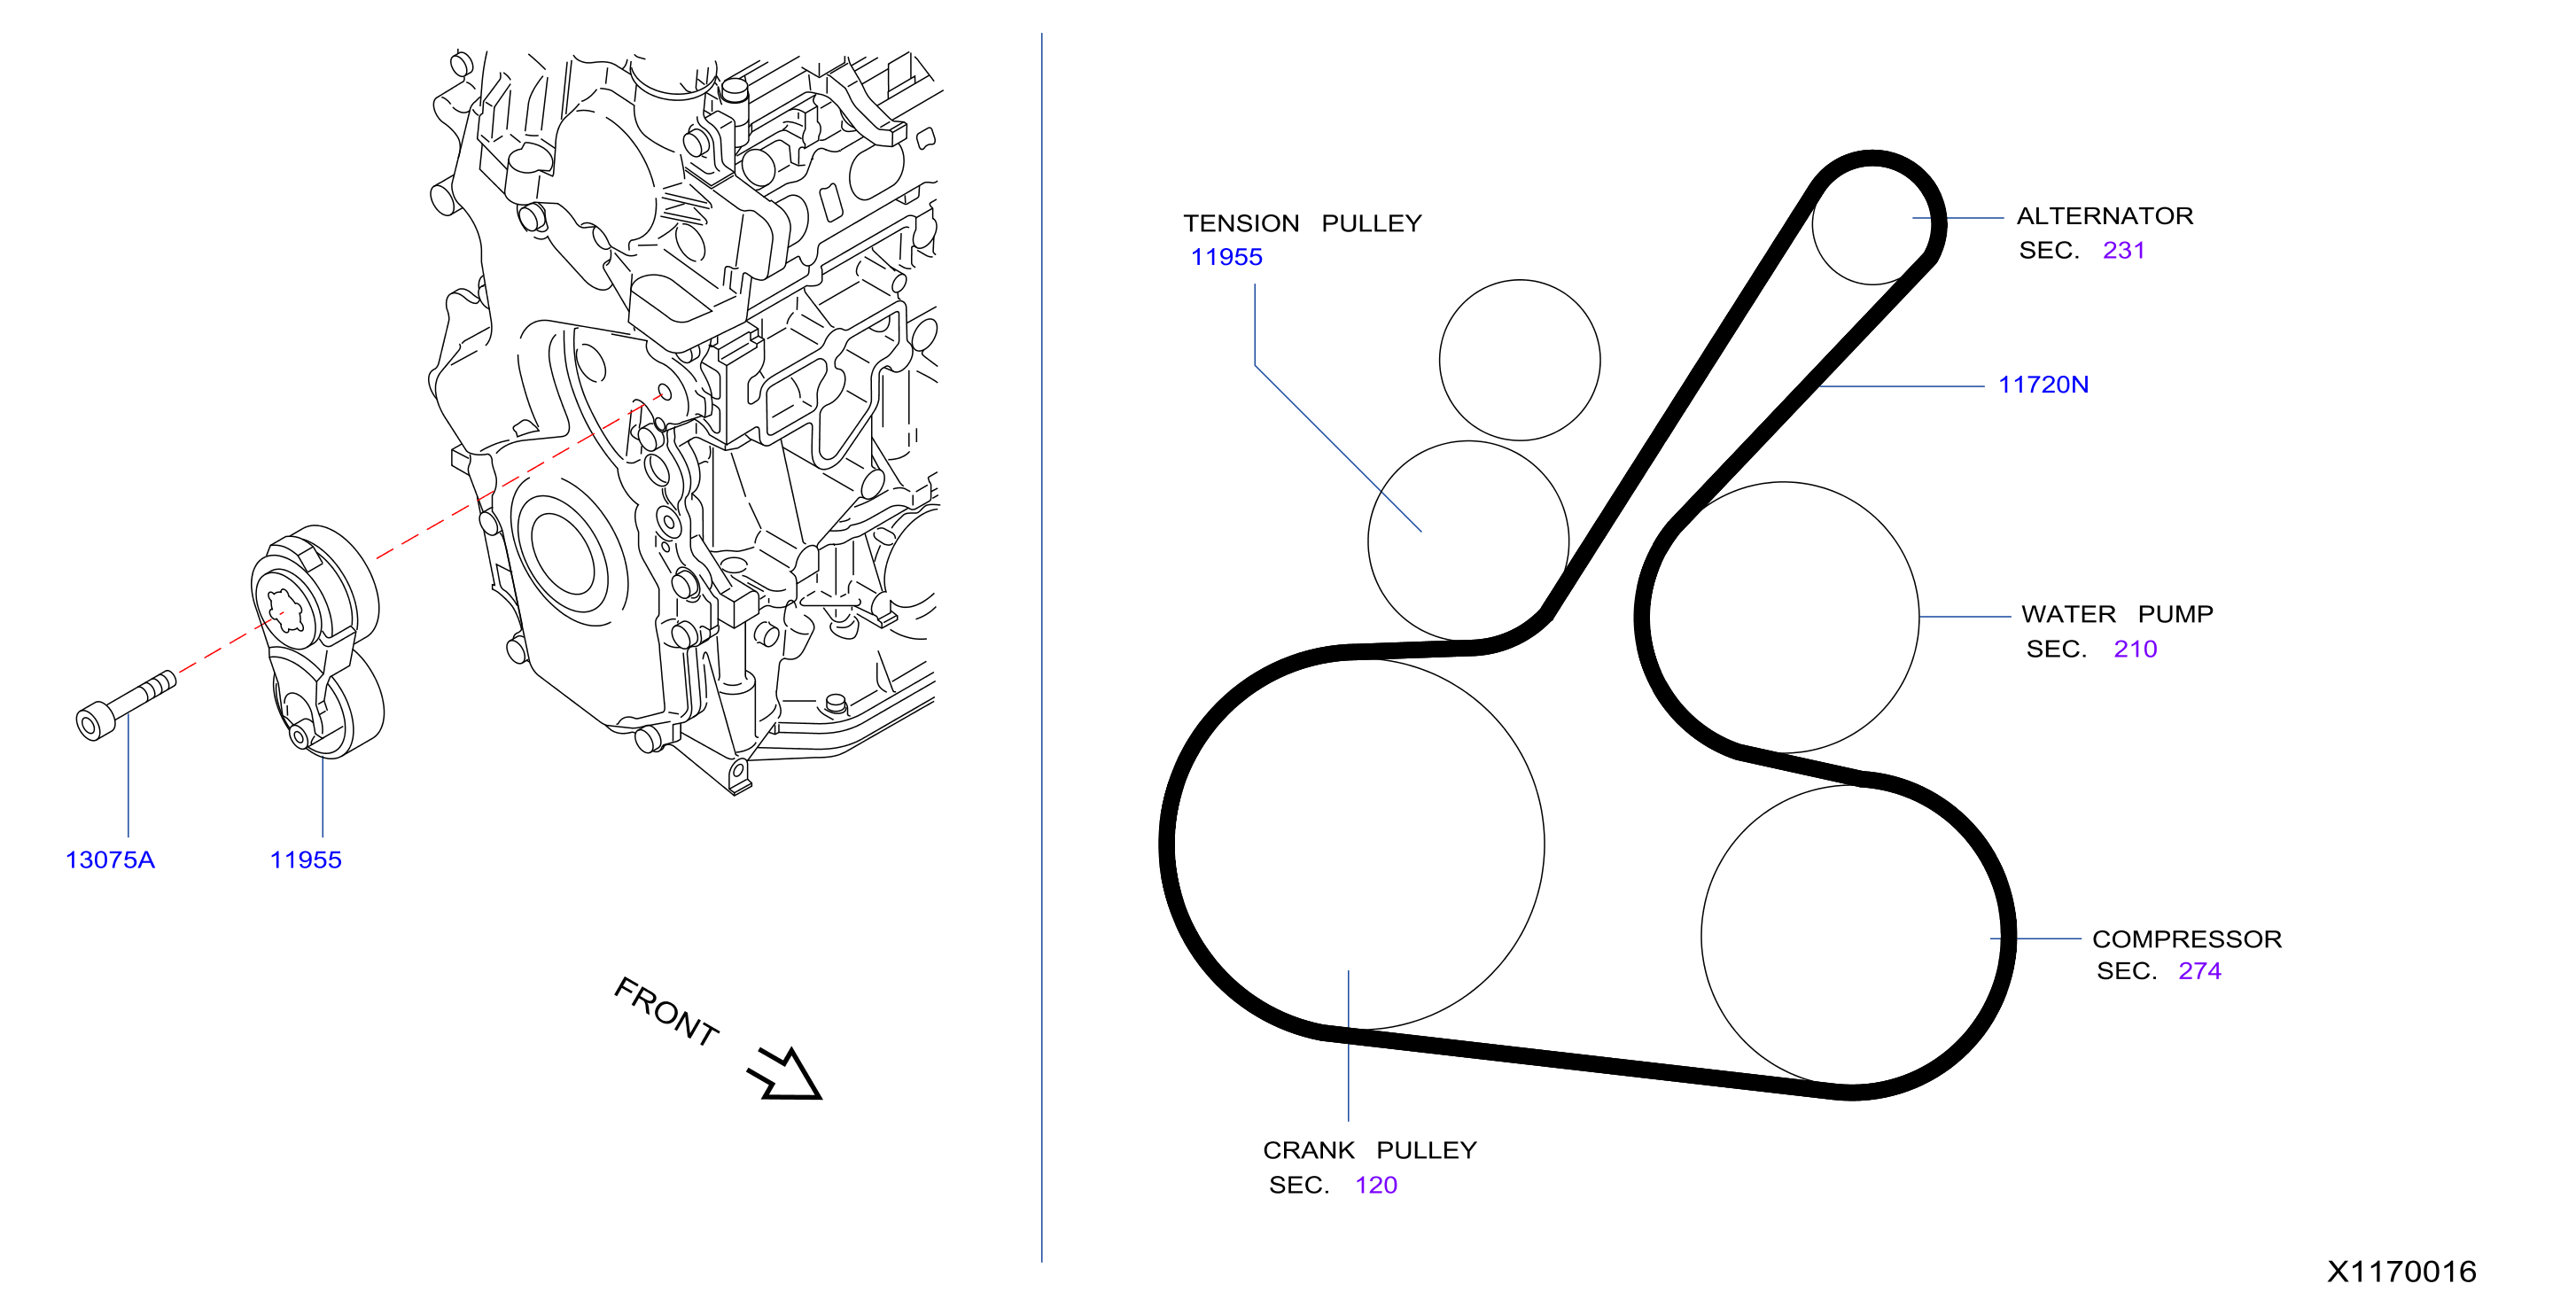
The serpentine belt drives components like the alternator, power steering pump, and A/C compressor. Routing is counter-clockwise:
- Start at the Crankshaft Pulley (Bottom)
- Route Over the Water Pump Pulley (Above crankshaft)
- Continue to the Air Conditioning Compressor Pulley (Driver's side)
- Proceed to the Idler Pulley (Top center)
- Go to the Alternator Pulley (Passenger side)
- Route Around the Power Steering Pump Pulley (Below alternator)
- Return to the Crankshaft Pulley
Automatic Tensioner: Located near the alternator/power steering area. Use a suitable wrench or breaker bar on the tensioner arm to release tension for belt removal/installation. Slowly release tensioner after new belt is seated.
Timing Belt/Chain Information (Critical)
2.5L QR25DE Engine: This engine uses a timing chain, not a timing belt. It does not require periodic replacement like a timing belt and has no routing diagram for a belt.
3.5L VQ35DE Engine: This V6 engine also uses a timing chain.
Warning: Both engines are interference engines. Incorrect timing chain installation or chain failure will cause severe engine damage. Chain service is complex and requires specialized tools and procedures not covered by a simple diagram.
Critical Steps for Any Belt Work
- Verify Engine: Confirm you have the 2.5L 4-cylinder (serpentine belt only).
- Disconnect Battery: Always disconnect the negative terminal first.
- Match Belt Routing: Double-check the installed belt or compare the new belt's path to the routing above before fully releasing tension.
- Tension Check: After installation, start the engine briefly and inspect for proper tension and alignment. Listen for unusual noises.
- Timing Chain: If investigating timing components due to noise or codes, diagnosis and replacement require professional expertise and specific service information far beyond a basic diagram.