Replacing Alternator Belt 2006 Mini Cooper S Diagram Easy View

Safety First: Park on level ground, engage parking brake, disconnect negative battery terminal. Allow engine to cool before starting. If inexperienced, consult a professional. Tools needed: socket set (10-17mm sizes), wrench, gloves, safety glasses, replacement alternator belt compatible with 2006 Mini Cooper S.

Tools and Prep

Gather these essentials: jack with stands to lift front of car (use manufacturer points), lug wrench, and belt diagram reference. Verify part number before purchase.

Access Points

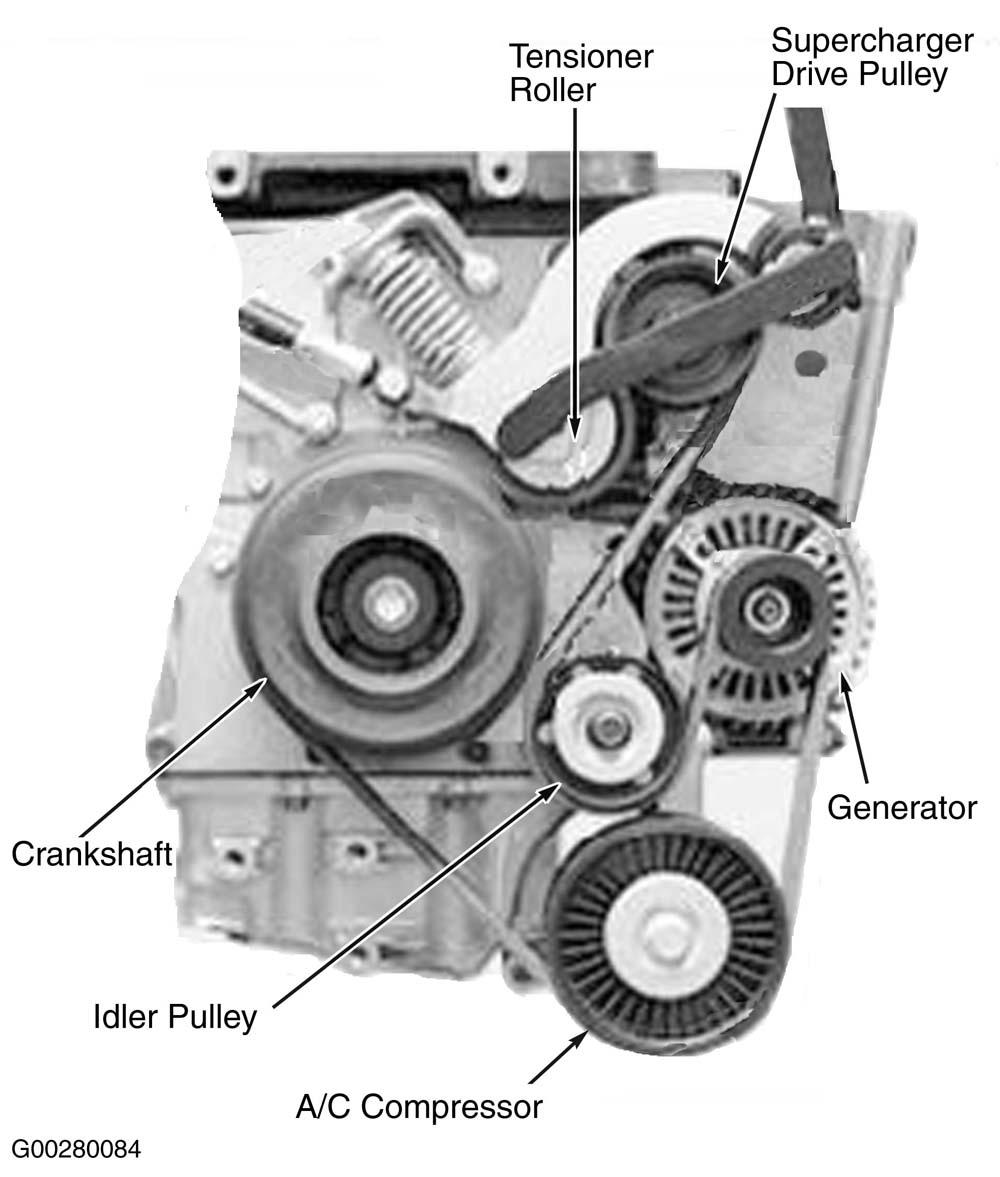
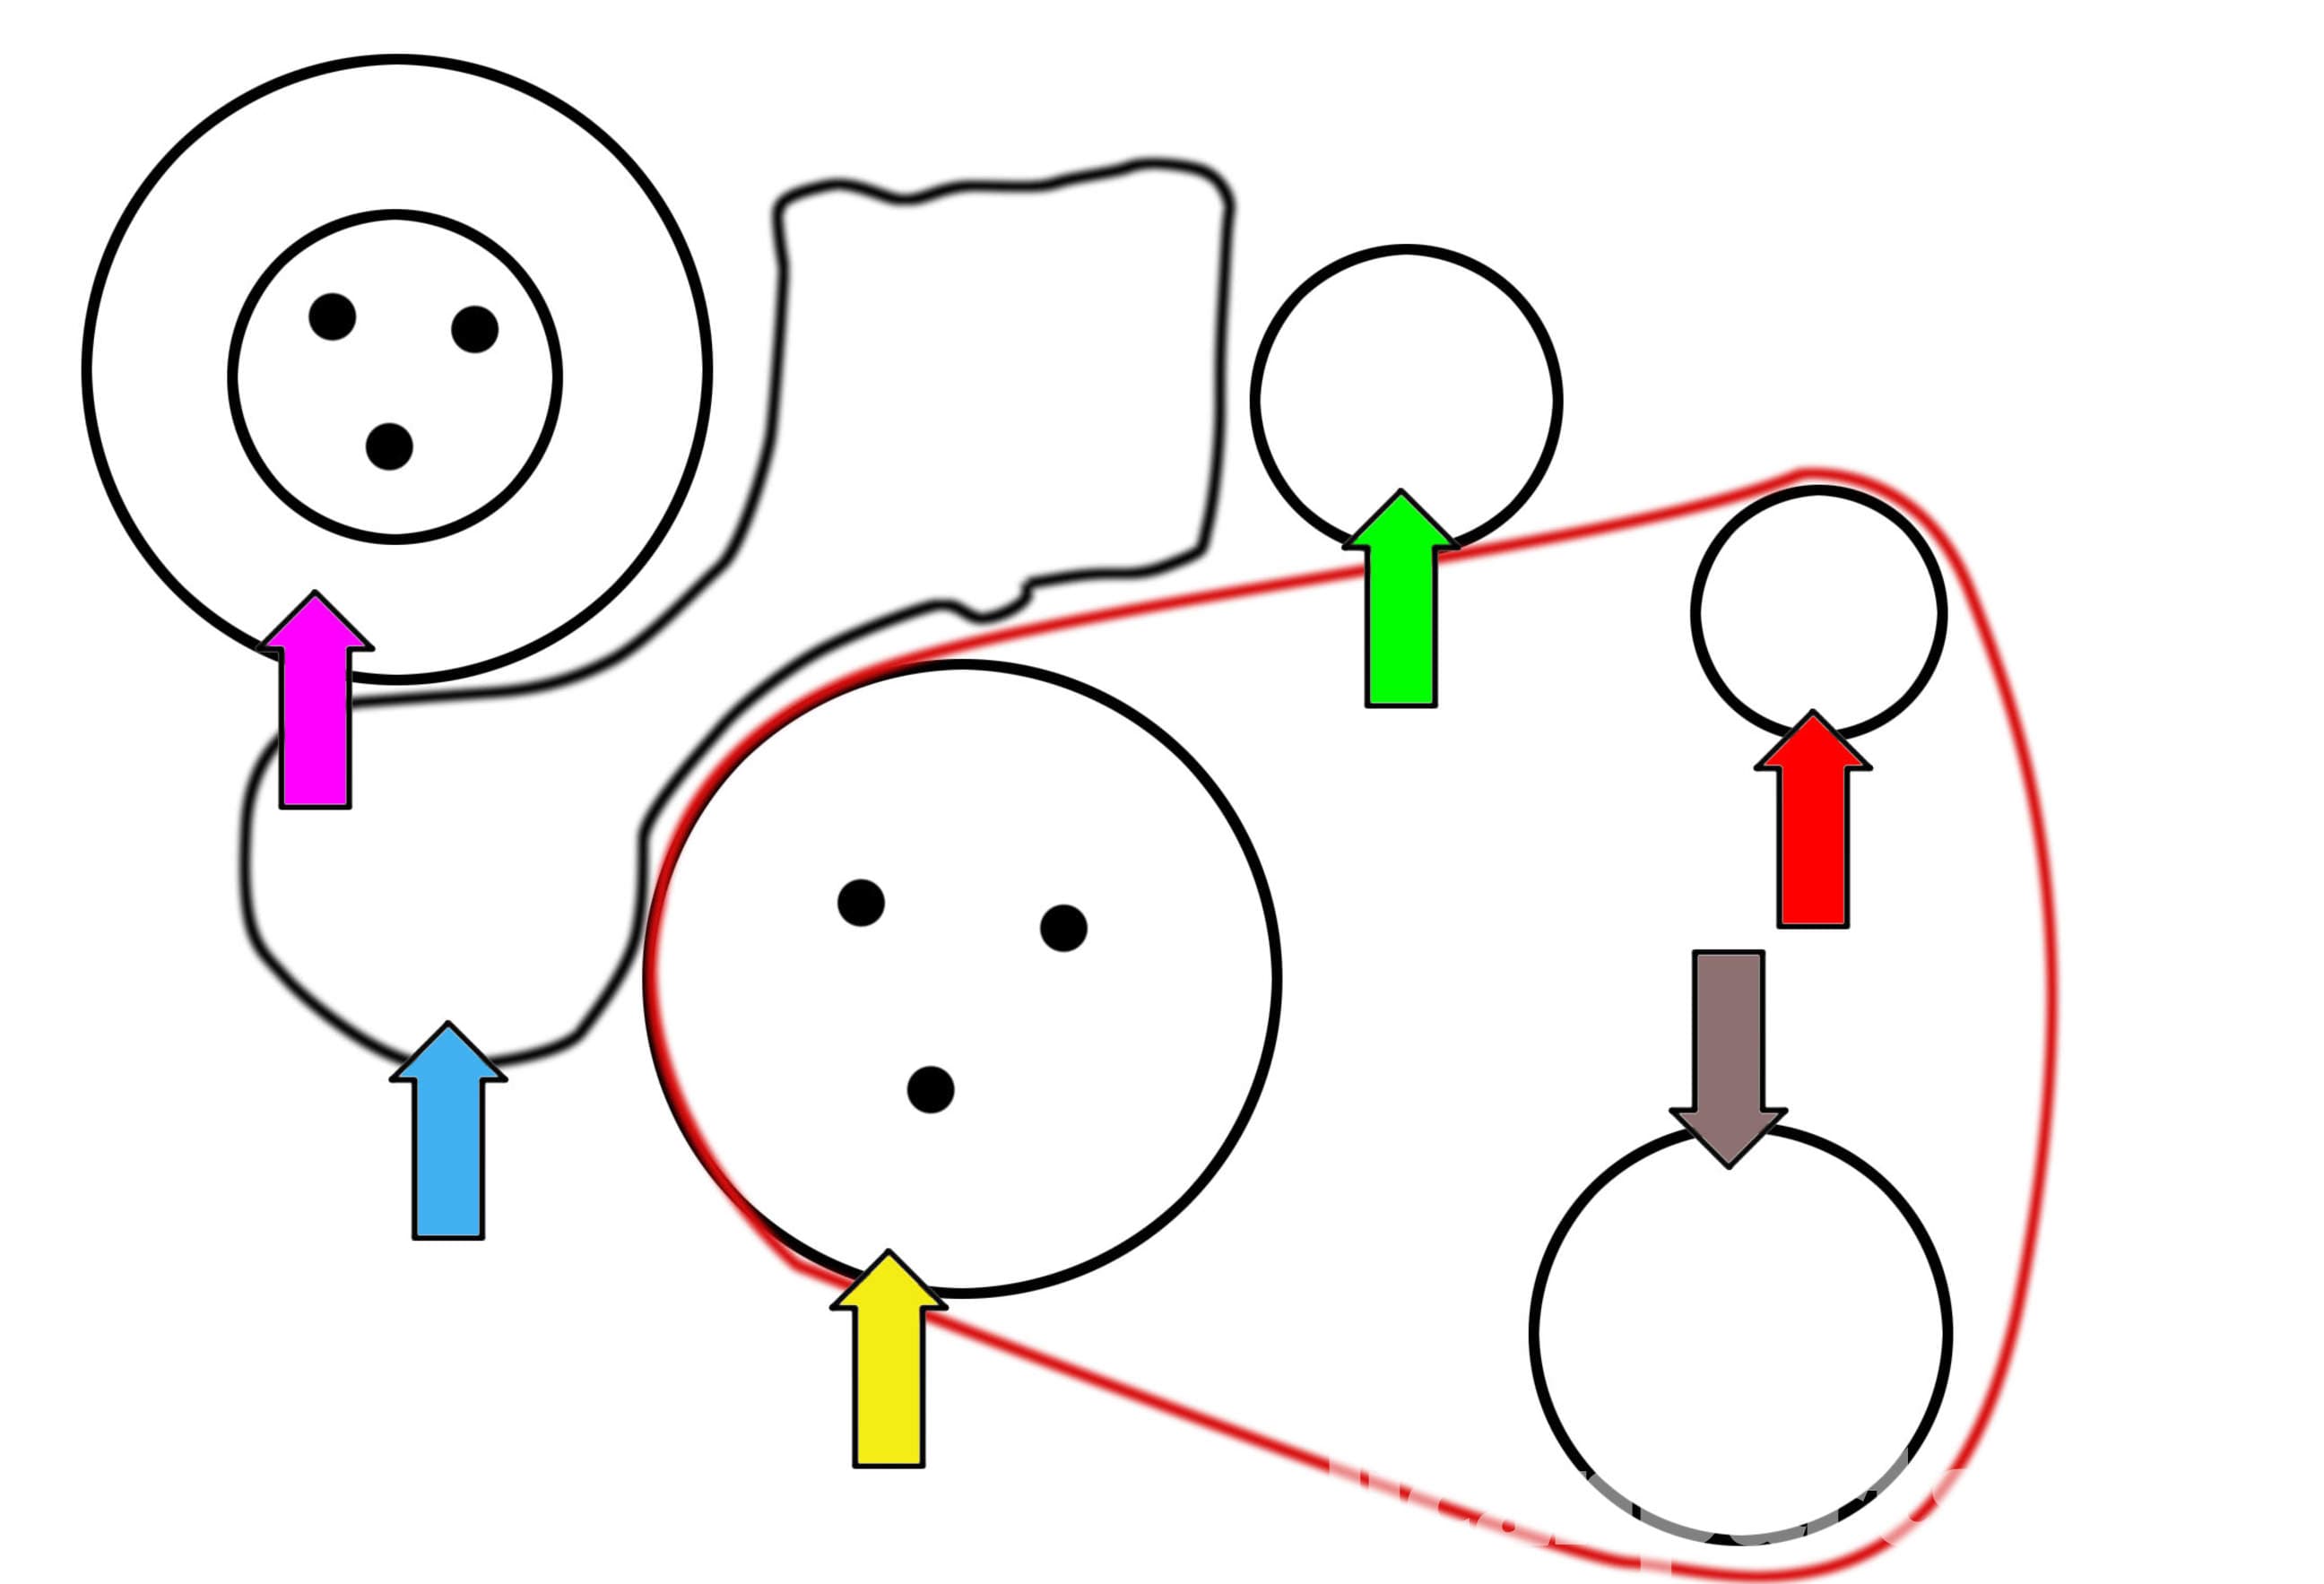
For easy viewing, the belt diagram for 2006 Mini Cooper S:

Replacing Alternator Belt 2006 Mini Cooper S Diagram Easy View
  • Crankshaft Pulley: Drive pulley at engine front.
  • Alternator: Located upper left.
  • Tensioner: Spring-loaded pulley near alternator.
  • Route: Crankshaft → Tensioner → Alternator → Crankshaft (counter-clockwise loop).

Simple Diagram:

- View from front:

Crankshaft (C)

Tensioner (T)

Alternator (A)

Replacing Alternator Belt 2006 Mini Cooper S Diagram Easy View

↖ Back to C

Removal Steps

  • Lift car, secure with stands. Remove wheel for access if needed.
  • Locate tensioner pulley. Use wrench on tensioner bolt to rotate clockwise.
  • Slip old belt off pulleys. Inspect pulleys for wear or damage.

Installation Steps

  • Route new belt: Start at crankshaft, over tensioner, then alternator.
  • Apply gentle tension by rotating tensioner clockwise with wrench.
  • Slide belt onto alternator pulley. Ensure it sits properly on all grooves.

Testing and Finish

  • Release tensioner slowly. Verify belt is taut with no slack.
  • Reconnect battery. Start engine and run for 2-3 minutes.
  • Check for unusual noises, vibration, or slippage. Lower car and test drive.

Note: Always replace with a quality belt and follow torque specs for bolts. Regular inspection prevents future failures.