
For 2008 Chevy Impala 3.5L models, diagnosing serpentine belt issues requires referencing the routing diagram while performing physical checks. Belt failure symptoms include squealing noises, battery warning lights, or overheating from accessory failure.
Locating Belt Routing Configuration
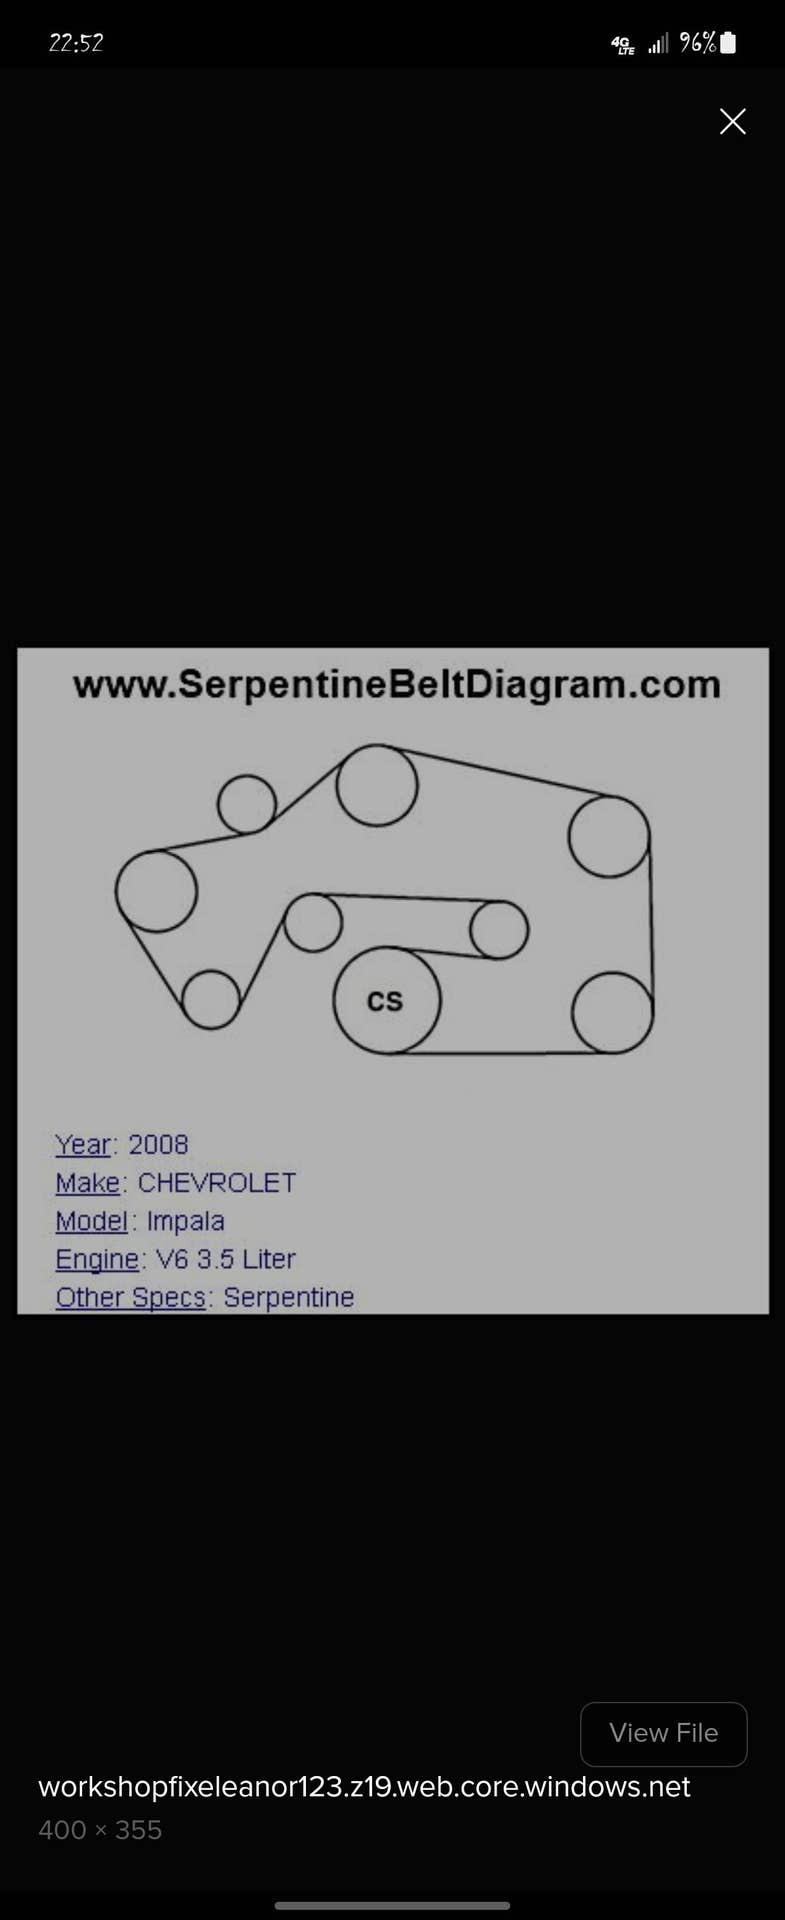
Open the hood and identify the belt routing diagram sticker typically on the radiator support or strut tower. If missing, memorize this standard 3.5L V6 routing pattern:
- Crankshaft pulley (bottom center)
- Counterclockwise to AC compressor (upper right)
- Down to power steering pump (lower right)
- Up to idler pulley (top center)
- Down to alternator (left)
- Back to crankshaft
Immediate Diagnostic Actions
Inspect with engine OFF and parking brake engaged:
- Check belt tension: Midway between pulleys, press firmly – deflection should not exceed ½ inch
- Examine wear patterns: Cracks deeper than 1/16" require replacement. Glazing indicates slippage
- Test pulley alignment: Run a straightedge across pulleys; misalignment causes premature fraying
- Spin idler/tensioner: Worn bearings cause grinding noises
Quick Fix Procedures
- Reseating a slipped belt: Rotate tensioner clockwise with a 15mm wrench, realign belt on pulleys per diagram
- Temporary noise reduction: Apply belt dressing sparingly between ribs while engine runs – not a permanent solution
- Emergency tension adjustment: Loosen alternator mounting bolts, pry outward, retighten (temporary measure only)
Critical Replacement Precautions
When installing new belts:
- Always replace both belt and tensioner simultaneously
- Route exactly according to diagram – incorrect installation destroys belts within minutes
- After installation, run engine for 5 minutes to allow stretching before rechecking tension
- Verify all accessories rotate freely; binding pulleys must be addressed