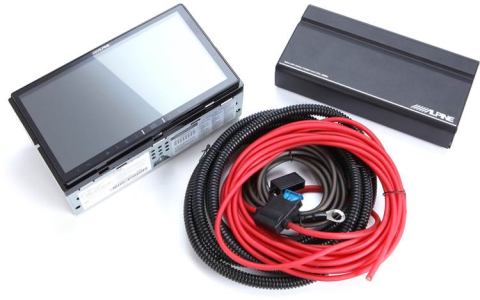
Installing the Alpine ILX-W650 requires specific tools for safe and proper wiring harness connections. Here's the essential toolkit and methodology:
Essential Tools
- Wire Stripper/Cutter: Precise 16-18 AWG stripping capability for clean connections.
- Soldering Iron & Rosin-Core Solder: Primary method for durable, low-resistance connections (60/40 or 63/37 recommended).
- Heat Gun & Shrink Tubing: Insulate soldered joints properly (select correct diameter tubing).
- Crimping Tool & Insulated Terminals: Use only high-quality crimpers with appropriate terminals if not soldering.
- Multimeter: Essential for verifying power, ground, speaker wires, and continuity.
- Trim Panel Tools: Non-marring pry tools for safe dashboard disassembly.
- Electrical Tape (Vinyl): Supplementary wrap for harnesses (avoid as sole insulator).
- 12V Circuit Tester: Quick-reference tool for confirming switched/constant power.
Wiring Methodology
1. Preparation
- Disconnect vehicle battery NEGATIVE terminal first.
- Remove factory head unit using appropriate tools.
2. Harness Connection
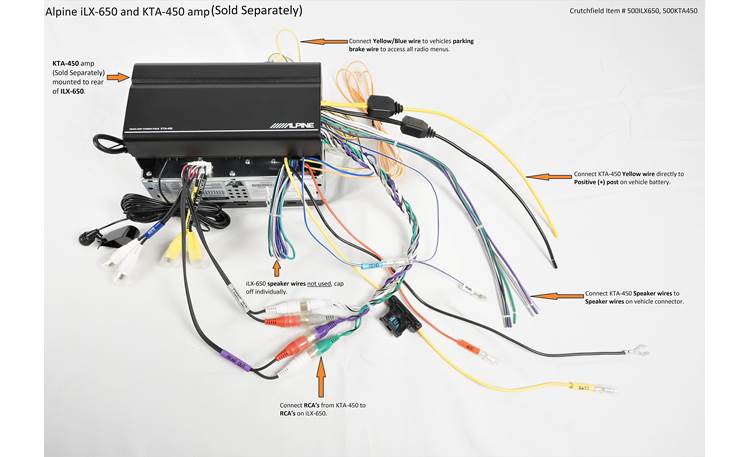
- Acquire vehicle-specific wiring harness adapter matching factory plug.
- Match ILX-W650 harness wires to the adapter wires (consult Alpine pinout).
- Key Connections: Constant 12V (BATT+), Switched 12V (ACC), Ground (GND), Illumination/Dimmer (if used), Antenna Trigger.
3. Secure Connections
- Optimal: Strip 1/4" insulation, twist strands, solder fully, cover with heat shrink.
- Alternative: Use high-quality crimp connectors ONLY with ratcheting crimper for secure bite.
- Never: Use wire nuts or "twist-and-tape" methods.
4. Steering Wheel Control Integration (If Applicable)
- Requires specific SWC interface module compatible with Alpine and vehicle.
- Connect interface wire (usually 3.5mm jack) to ILX-W650's SWC port.
- Interface module wires connect to harness adapter and factory SWC wires per module instructions.
5. Testing & Assembly
- Multimeter Check: Verify BATT+ (12V constant), ACC (12V w/key on), Ground (continuity to chassis), speaker polarity.
- Reconnect battery. Power on ILX-W650. Test all functions (audio outputs, SWC, illumination).
- Securely route and zip-tie harnesses away from moving parts.
- Secure head unit in dash kit, ensuring no wire pinching.
Investing in quality tools and using soldered connections ensures long-term reliability and optimal performance from your Alpine ILX-W650 installation. Allow 1-3 hours based on complexity.